3D Printing the Spider Bot
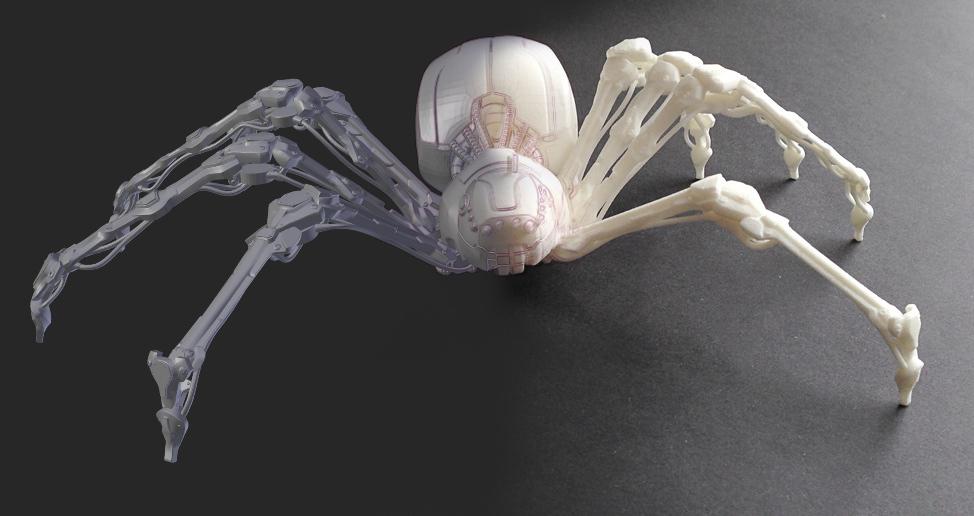
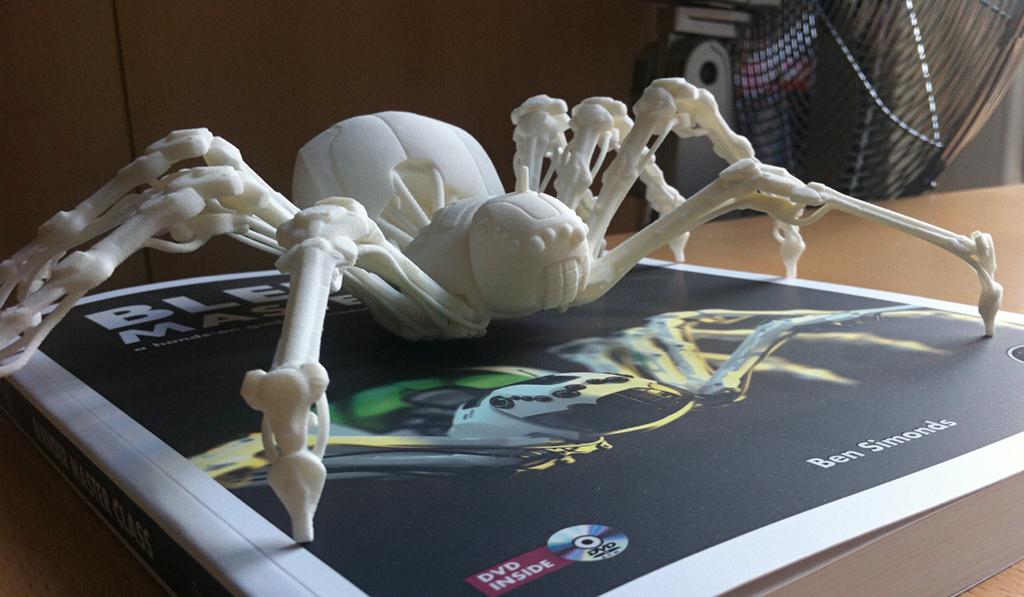
Previously I posted some pictures of the 3D printed version of the spider bot from my book, Blender Master Class. In my original post I promised I’d put together a post detailing some of the process of altering the model for 3D printing, as a guide for others wishing to 3D print their own models. The book itself describes the modeling of the original model so I wont go into that, but I’ll cover the most important changes I made.
Preparation
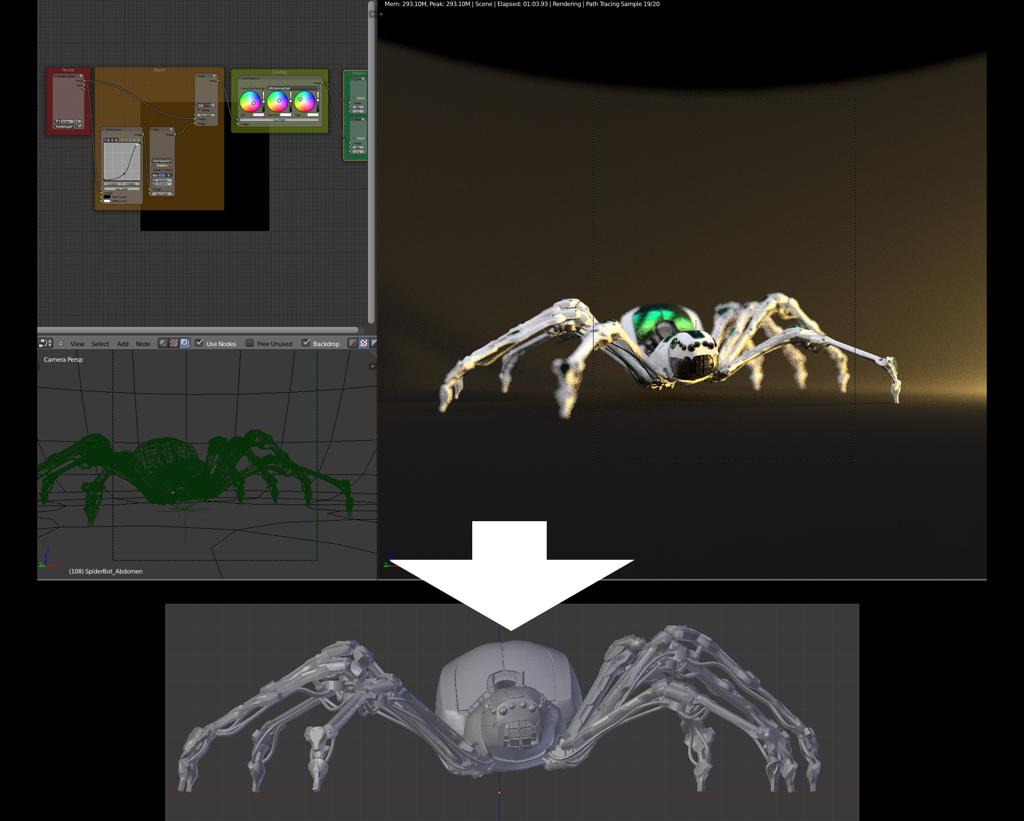
My first task was to take my finished .blend file that I had used to render my spider bot, and make it more suitable for preparing it for 3D printing. The original spider bot had a whole bunch of textures and materials, as well as a basic environment with lamps and so forth, none of which would be needed for the 3D print. So I opened up the blendfile and re-saved it as a new blend, before deleting all of the extraneous objects such as lamps and backdrops. I then used the material utils add-on to assign a single material to every part of the model. The add-on lets you select multiple objects and use the keyboard shortcut Q to modify all of their materials at once, which makes it useful for this sort of task.
Stripping away the extraneous parts of the scene.
Applying Modifiers and Making Manifold Meshes
The next stage was to convert all the parts of the model into mesh objects that could be exported predictably. Some parts of the spider bot had been made using curve objects, and many others had modifiers affecting their geometry that would need to be applied in the final model. For this stage I used layers to keep track of which objects I had converted. I moved all my objects to a single layer, then used a second layer as a “workbench” layer. I moved objects one by one to the workbench layer where I made sure they were converted to meshes, then moved them to a third “finished” layer. This made it easier to keep track of what parts of the model I had tackled. Applying modifiers can be done in two ways - either you can click the Apply button for each modifier in the stack (be sure to start from the the top of the stack - the first modifier applied to the mesh - otherwise you may get some unexpected results), or you can use the convert to mesh operator (Alt-C), which applies all modifiers as well as converting curves and other object types into meshes. The latter is also useful for applying modifiers to multi-user meshes because you wont get the “Modifiers cannot be applied to multi user data” message that you receive when trying to apply modifiers individually.
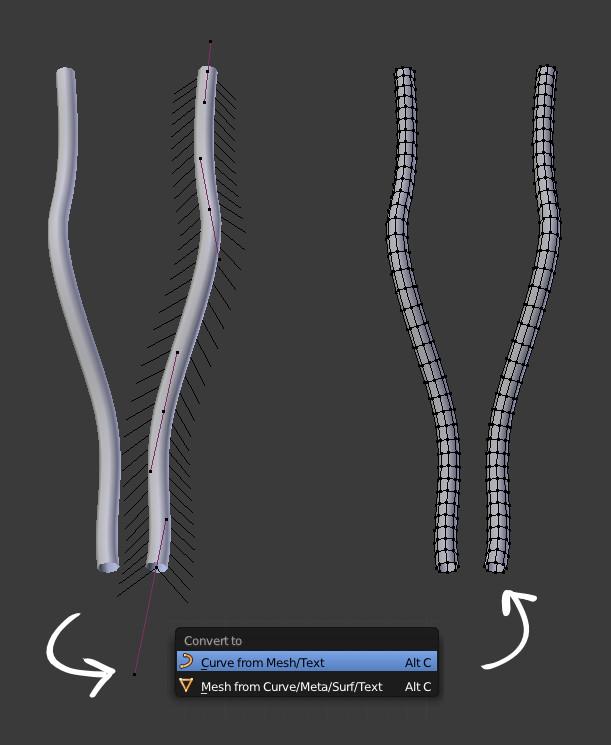
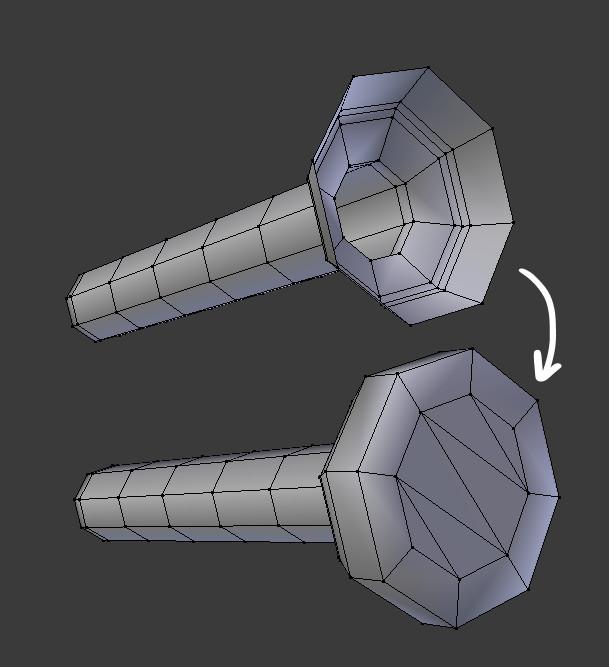
Left: Curve object with mirror modifier. Right: Converted to mesh with modifiers applied. For some objects I ignored subsurf modifiers, choosing instead to just apply any other modifiers and leave the mesh in a less-smooth state. Later on I would be aiming for a more uniform density of polygons over my whole model so I didn’t want to subdivide any meshes too heavily early on. Whilst going through each part of the model I also made sure that each part of the model was a manifold mesh. This means that each part of the mesh enclosed a solid volume, and that meshes didn’t have open edges or loose vertices. This is important for 3D printing as the 3D printing relies on solid volumes, not polygonal surfaces. Blender has some useful tools for speeding up this process. First off you can highlight any non-manifold edges whilst in edit mode with the keyboard shortcut Ctrl-Alt-Shift-M. Secondly to close holes I often used the “Beauty Fill” operator (Alt-Shift-F). Contrary to it’s name it just fills the hole with ugly triangles, but for areas that wont be seen it does the job well enough. For some areas, instead of beauty fill I just fill the hole with a single n-gon, then inset this slightly to create an edge loop around the hole, and then convert the n-gon to triangles. This gives a slightly neater fill. Of course for some areas there’s just no substitute for creating geometry by hand.
Scaling
With our model cleaned up and converted into manifold meshes, we can start treating our model as something to be 3D printed. The first important thing to decide about our 3D printed model is how big we want it to be. This will affect what modifications we will need to make to be sure that it prints correctly. To get measurements in real world units you will need to go to the scene properties of your blend file (in the properties editor), and set the Units for the scene to Metric. I also used a Scale setting of 0.001 to set the the scale ratio to 1mm = 1 blender unit. This works much better for small objects than the default of 1m = 1 blender unit.

For the spider bot, I resized the model to be approximately 23cm wide including the legs. This is pretty large but most of the spider bot’s width is its spindly legs so making it this size didn’t make it too expensive. To scale up the whole model I un-parented each object in the spider (keeping transformations), then parented everything to a single empty. Then I added a cube to the scene and resized it to the dimensions I wanted the spider to be. Finally I scaled the empty to match the spider to the size of the cube.
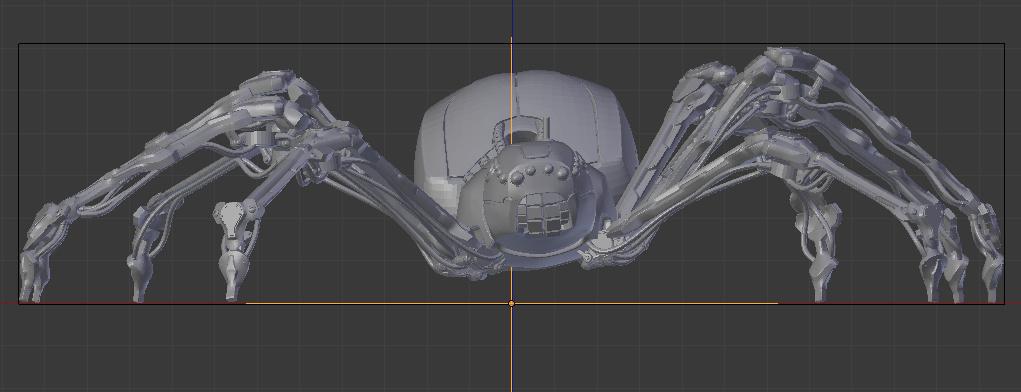
Matching the scale to fit the bounding box of a cube. Remember that the price of your model scales according to it’s volume, not its size along a single dimension. This means that scaling a model to be half as tall will make it use approximately 8x less material (0.5^3). Because you pay by the cubic centimetre, making your model just a little smaller can make it much more affordable.
Making Large Objects Hollow
Now we get to some more specifically 3D printing focussed modifications to the model. To keep the cost of 3D printing down we want to use as little material as possible. The best way to do this is to make any large parts of the model hollow, so that only their outer shell actually contributes to the amount of material required. This is made relatively easy in most cases by using the solidify modifier. Once you know the minimal wall thickness that the material you are printing in can tolerate, you can hollow out your objects to this thickness (plus a bit extra for safety). For Shapeways white, strong, and flexible material the minimum wall thickness is 0.7mm, though I tried to keep my walls in the 1.5-2mm range.
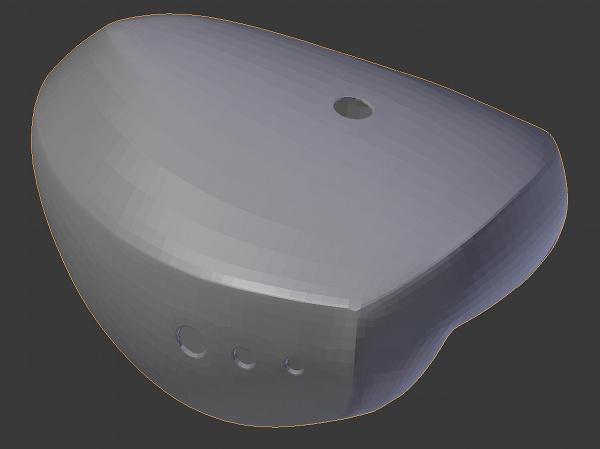
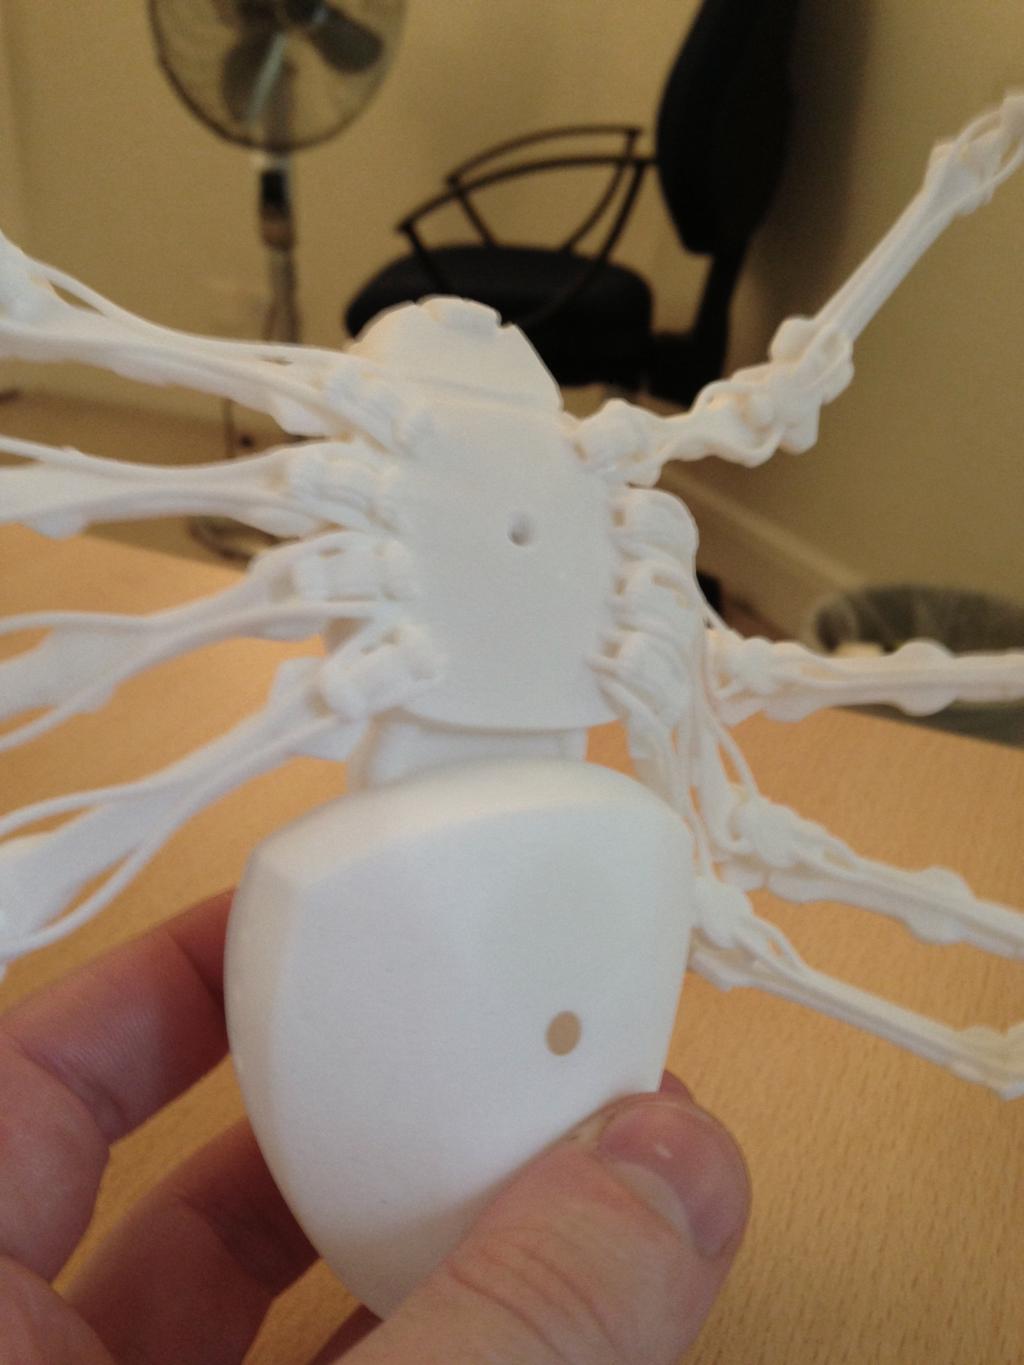
The only object I made hollow were the cavities of the abdomen and thorax (the main body parts) of the spider. For these I added solidify modifiers and applied them. When making objects hollow you also need to leave a hole for the support material to leave through when printing, so once I applied the solidify modifiers I cut some holes in the bottom of these pieces and bridged the faces between the inside and the outside of the shell. The hole in the thorax could have done with being bigger (or the shell being slightly thinner around the hole) in the end, as the powder didn’t quite drain out of it in the final print, something I’ll take note of on future prints.
Thickening Small Pieces
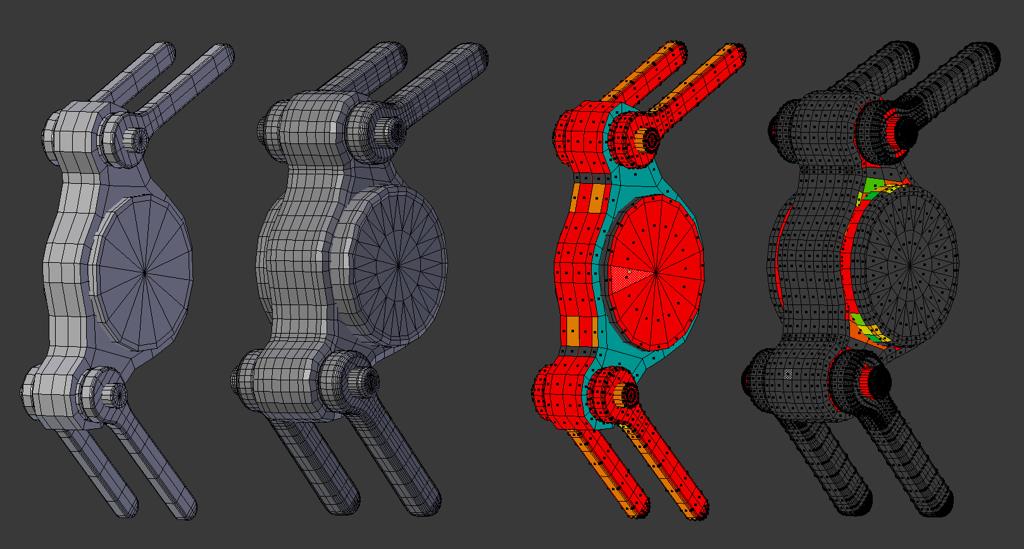
The spider bot has a number of small, thin pieces, and this was a challenge when preparing it for 3D printing. The same minimum wall thickness must be applied to these parts to make sure they print correctly. The new tools in blender 2.67+ make this much easier than previously, thanks to the new mesh analysis tools and the 3D Print Toolbox add-on. These are great for checking that your mesh will hold up to 3D printing. I particularly used the thickness overlay of the mesh analysis tool to check that small parts of the model were thick enough to print. For example the wires beneath the legs, which had to be thickened up significantly, and the joints between the leg segments, which I inflated slightly as well so that they connected with one another more strongly. I set the minimum thickness to 0.7mm and the upper limit to 2mm to preview any areas that could have been problematic so that I could fix them.
The original mesh of one of the joints and the thickened up version. On the right is shown the mesh analysis overlay. Red areas are too thin, and need thickening up. Some areas are still highlighted in the thicker version but I think these are artifacts of surfaces meeting one another - the print came out fine. The shapeways crew also check for this sort of thing, and will let you know if a part of your model looks like it won’t print. The first time I uploaded the model I missed a couple of joints that still had small fiddly parts. I also was advised to thicken up the wires a bit more. After making these changes I didn’t have any surprises in the final model, all the details printed really nicely.
Adding Structural Support
The original design of the spider bot lived exclusively in the digital realm. As a result it didn’t need to pay heed to any heed to concerns like structural integrity or balance. For the 3D print I had to make sure that my final model would support it’s own weight and not topple over or have it’s legs snap off. Thanks to the spider’s anatomy I didn’t need to be particularly concerned about balance - the spiders center of weight is very low and supported by eight widely spaced legs, but I decided I needed to make sure the legs were sturdy enough. To this end I added some simple geometry bridging the gaps between each of the leg joints and between the legs and the body. I was going to put a photo here showing these supports on the final model, but to be honest you can barely see them anyway!
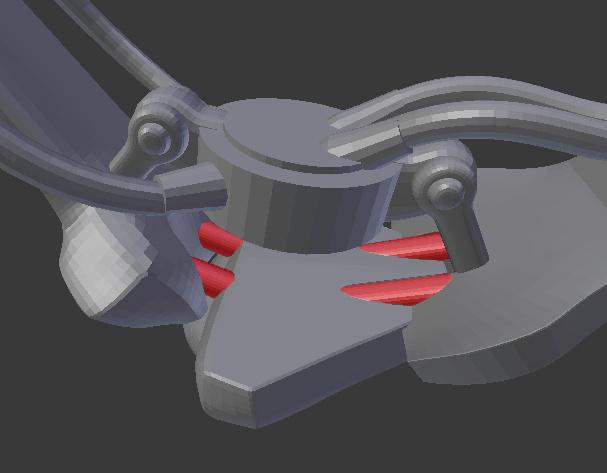
Structural supports bridging the gaps between leg joints, highlighted in red. For the abdomen (the rear segment of the body) I also added an internal support between the top and bottom of the hollow shell I had created, just to make this part a bit more resistant to compression.
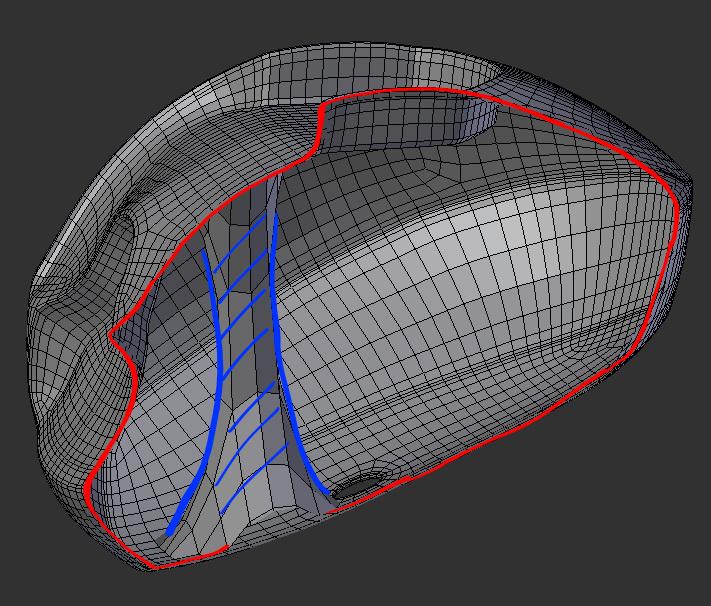
Cutaway showing the structural support inside the abdomen in blue.
Subdivision, Decimation and Exporting
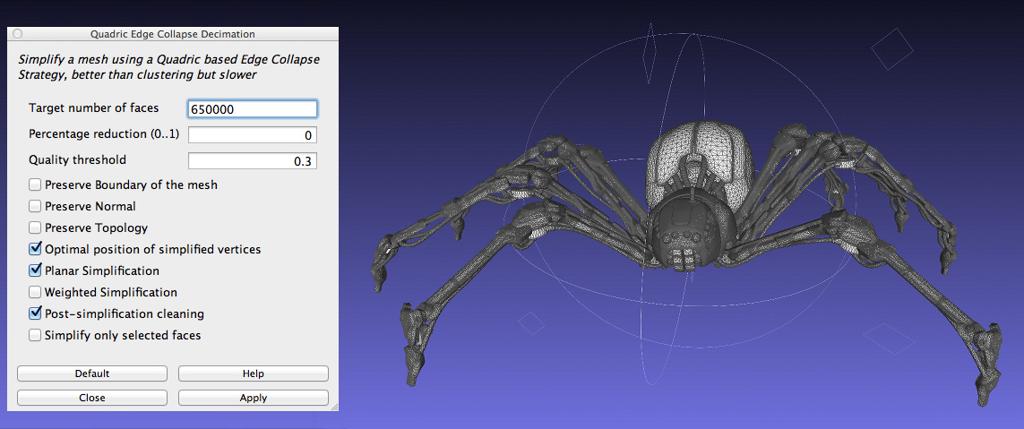
With the structural concerns dealt with, all that remained was to get my model ready for exporting. First off I made sure that all the important parts of my model looked smooth enough by adding some extra subdivision to some objects. Remember that there’s no such thing as “smooth shading” on a 3D printed model, and that if your model looks faceted when shaded flat it will print that way too. On the other hand the printing process its self results in a certain amount of smoothing of details and faceting at small scales, so you don’t need to subdivide things too much. On the other side of the equation you need to make sure that your model complies with the maximum file size and polycount restrictions for uploading models to Shapeways (assuming you don’t have a 3D printer of your own). The maximum poly count is 750k faces and the maximum file size is 64MB. I found the file size limit was the more problematic, but the solution to either issue was to apply a bit of decimation to simplify your model. I used MeshLab for this, as it has some excellent tools for decimation and still beats blenders (admittedly significantly improved) decimate modifier for decimating large models. I exported the whole model from blender as an .obj file, then imported it into MeshLab. I used the quadratic edge collapse decimation method (Filters-Remeshing-Quadratic Edge Collapse Decimation) and set the target polycount to 650,000, which brought my file-size when exported to .stl to under 64MB. Make sure when decimating with MeshLab to turn on “planar simplification” in the decimation settings, as otherwise you will get ugly, long quads on flat surfaces.
Decimating in MeshLab I re-imported the model back into blender just to check it over once more, and then exported it as an .stl file, and uploaded it to Shapeways. They took care of the difficult parts from there. You can find some more pictures of the final print in my original post.
Comments
3D Modeling | Runes in the Sand (Dec 17, 2013)
[…] It looks as though Blender can do way more than I’ll ever need as far as 3D modeling goes but can it be used in 3D printing? What what I’ve found so far is that Blender does support the base file format called STL. There is a file standard, used in 3D printing, called Additive Manufacturing File Format (AMF) that Blender doesn’t seem to currently support. It looks like it may be possible to export a Blender file to this format using a third party add-on. Since the file format requires vary among printers I’m not too worried that any work I do in Blender can’t be utilized for printing. If Blender can’t natively support the requirements of a given project, then there is likely a way to import it into another program that can convert the model into a useful format. Here’s a item that described what this person went through to convert his Blender model into a 3D printed object. […]
konrad (Sep 13, 2013)
how mush did this spider cost?
konradtacular (Sep 13, 2013)
How much did this cost you?
Ben Simonds (Sep 13, 2013)
I think it was about £70-ish.
3D Printing the Spider Bot | BlenderNation (Dec 04, 2013)
[…] 3D Printing the Spider Bot […]
3d print, 3d printing, blender, book, decimation, meshlab, shapeways, solidify, tutorial, tutorials, wall thickness, white strong and flexible — Jun 18, 2013
