
Magic Eye Pictures with Processing and Blender
Click the image above for full size, then try and look through it. If you’ve still confused I’m not surprised, there’s a bit of a knack to it. Yesterday, I decided to start learning a bit of Processing, and after following through a few tutorials I came up with the idea of making a random dot stereogram generator. Random dot stereograms, also known as Magic Eye pictures (the trade name of the company that popularised them in the 90’s), are images made up of repeating patterns, that when viewed correctly give the impression of seeing a 3D shape appear magically out of the pattern. The wikipedia article on autostereograms gives a much better explanation of how they work than I can here, but what follows is a brief explanation. Autostereograms work via the wallpaper effect. When you look at a horizontally repeating pattern, it’s possible to convince your brain that two separate but identical parts of the pattern are actually the same part, but located on a different plane away from the real surface of the pattern: [caption id=”” align=”aligncenter” width=”491”
![]()
http://en.wikipedia.org/wiki/Autostereogram
How autostereograms work, from Wikipedia. But this alone just creates the effect of the pattern floating on a plane behind the image itself. In order to create a 3D image using this technique, we can change the amount of shifting between repeats of the pattern. By reducing the distance between repeats in certain parts of the image, we can trick our brains into perceiving these areas as being closer to us. To do this we just use a black and white depth map to define, for each pixel, how great the amount of shifting should be. Far away (dark) areas receive the default amount of shifting, closer areas (bright) receive less. This struck me as an ideal way to test out what I’d learned so far in Processing, as the principle was basically just a simple manipulation of pixels, but it was something that wouldn’t have been easily possible in my usual go-to app (Blender), because of the way that pixels further to the right in a row rely on how far previous previous pixels in the row have been shifted, meaning that it isn’t easy to render the image all at once. In Processing however I could cycle through each row with a for loop, progressing left to right. Here’s the script I came up with.
//Declare Variables
PImage noise; //Image containing my repeating pattern.
PImage depth; //A depth map for the 3D object, rendered with blender.
float shiftrange = 0.3; // Proportion of the pattern width to use for shifting to create depth.

void **setup** () {
  size(1024,1024);
  // Load pattern and depth map.
  noise = loadImage("noise3.png");
  depth = loadImage("depth7.png");
  noLoop();
}

void **draw** () {
  //draw first column
  image(noise,0,0);
  //Work through the image row by row, column by column.
  loadPixels();
  for (int x = 0; x < width; x++) {
    for (int y = 0; y < height; y++) {
      int locwindow = x + (y*width); // Gives the pixels index based on it's x and y coordinates.
      float zdepth = (green(depth.pixels[locwindow])) / 255.00; // Gives the zdepth of the pixel as a value between 0.0 and 1.0
      int shift = int(noise.width - (zdepth*(noise.width * shiftrange))); // Calculates the amount of shift for the pixel.
      // If in first col, ignore shift (nothing to repeat yet):
      int locshifted = locwindow;
      if (x < noise.width) {
        //println("x is in first column"); //optional feedback
      } else {
        locshifted = (x-shift) + (y * width); // Gives the index of the pixel to repeat.
      }
      // Now set the new pixel colour to that of the pixel to repeat.
      pixels[locwindow] = pixels[locshifted];
    }
  }
  updatePixels(); //Update the final image.
  saveFrame("magiceye.png"); //Save an image as the output.
}
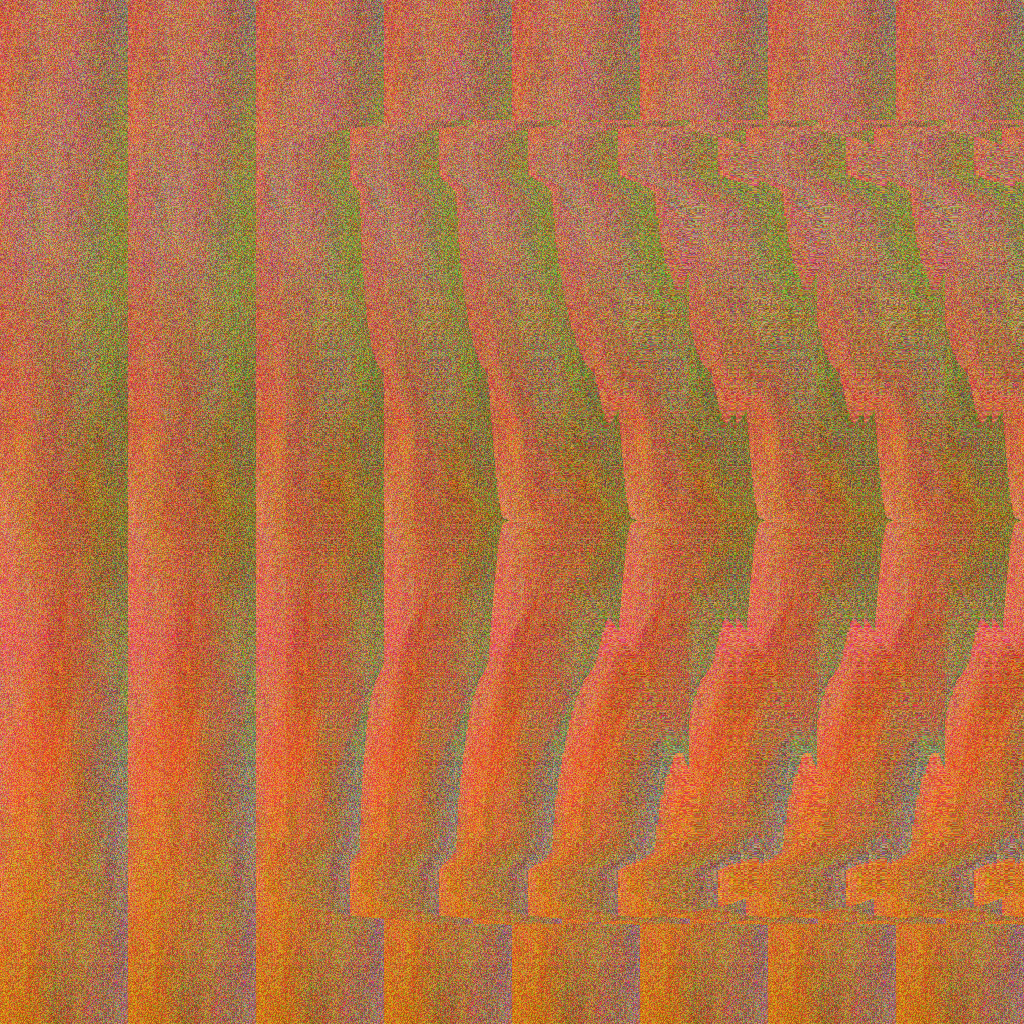
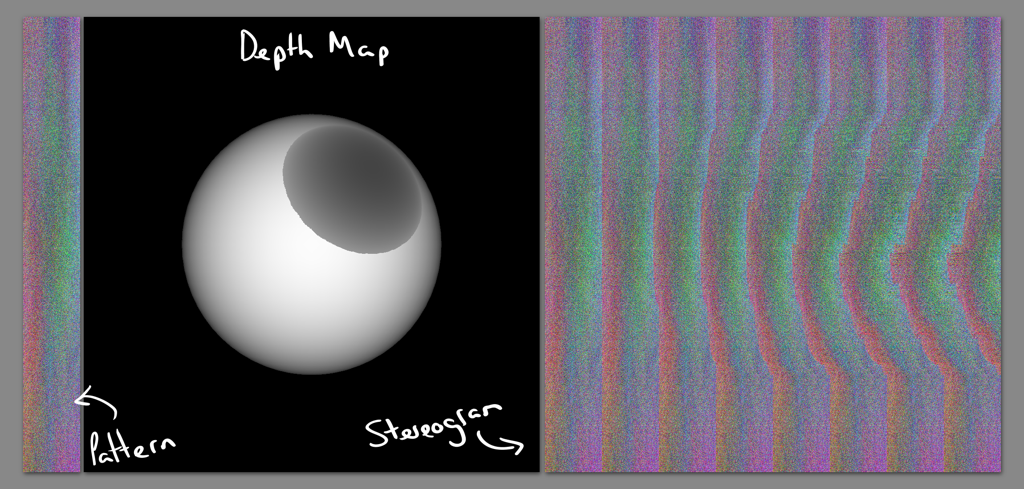
It takes two inputs, one the pattern to repeat, the other a depth map. The result is a random dot stereogram. Below is the result of using a sphere with a hole in it as the depth map (rendered with blender), and the pattern on the left as the input for the noise (click for full size to get the best out of the 3d effect).
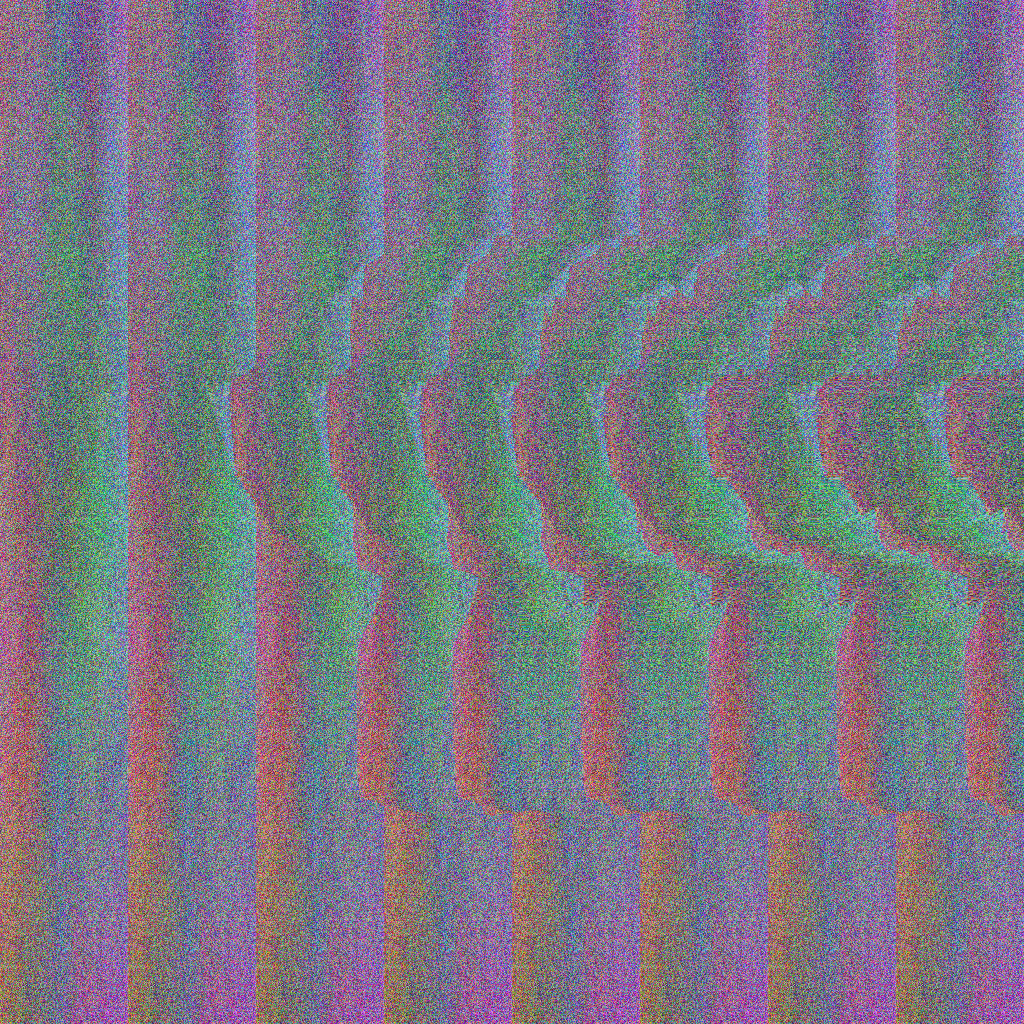
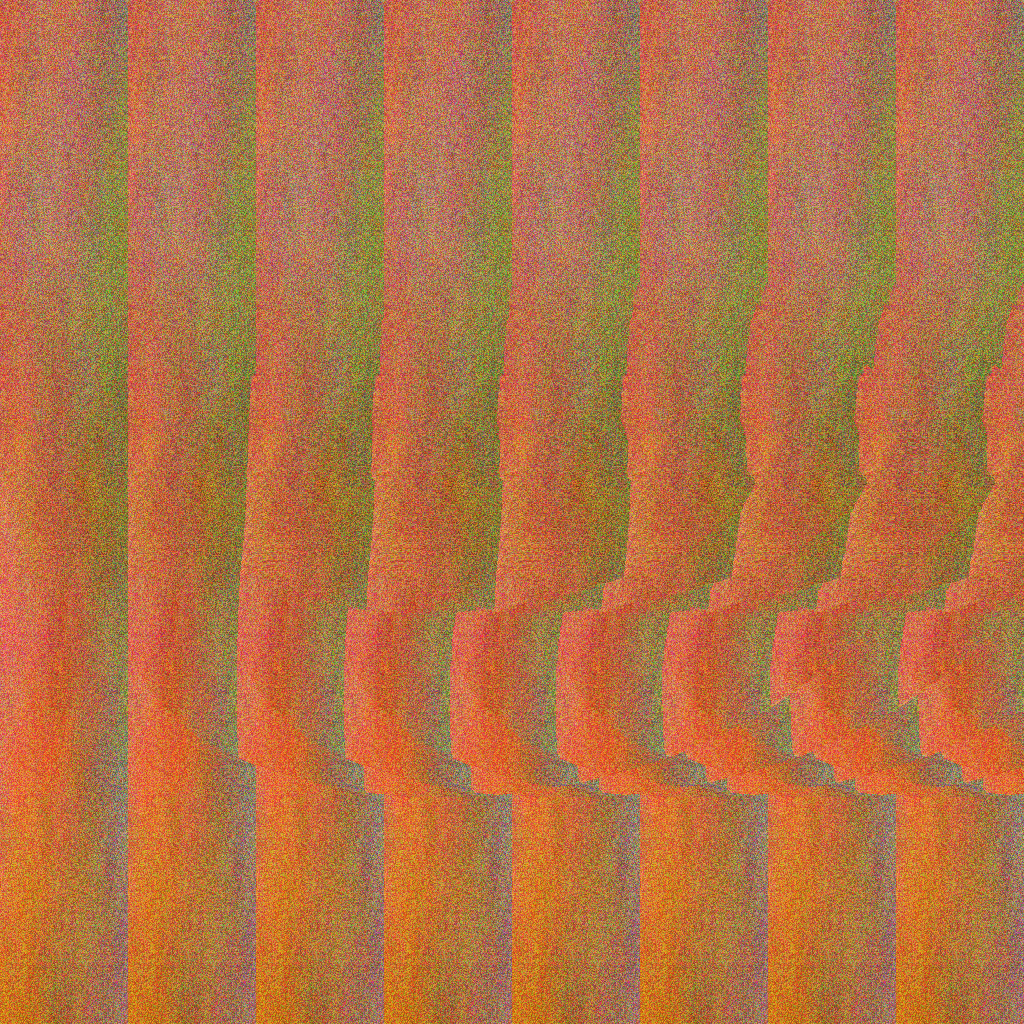
Anyway, it was pretty fun to play with, and I generated a few stereograms. I’m still in the process of learning how to tweak the script to get the best effect (mainly by adjusting the maximum and minimum amounts of shifting), but here’s some results (click for full size, and see the filename for a clue if you can’t get it):
Now if you’ll excuse me I need to go and rest my eyes. Debugging the script took a lot of staring, and it’s weird trying to make yourself see a 3D image when you aren’t even sure whether there should be one yet….
Comments
DC (Aug 27, 2013)
Hi, I used some of your code to make a random dot stereogram in processing. Was really helpful. Hope you don’t mind. Thanks.
The sketch:
http://www.openprocessing.org/sketch/106591
Ben Simonds (Aug 27, 2013)
Cool!
vitos1k (Jun 07, 2013)
cool! but on the Vase image, there are few pixels grouped together, that are off, and are ruining the picture, on the top part of the vase
Ben Simonds (Jun 07, 2013)
I think I see what you mean. The vase actually has some holes around the top of it, but the 3D effect works better without them. I’ve updated the image. Cheers!
vitos1k (Jun 08, 2013)
ah! much nicer now
thanks for the code
Man with 20 less minutes (Feb 01, 2014)
Stared at the first image for 20 minutes before reading. My bad. lol
Autostereograms | Kalshiev (Aug 10, 2016)
[…] If you want to make your own or learn more about magic eye pictures visist: Ben Simonds’ Tutorial […]
Magiceye Venus | Kalshiev (Aug 11, 2016)
[…] For a tutorial on how to make these click here […]
Estereograma – – MATEUS TARGINO – (Aug 27, 2018)
[…] Magic Eye Pictures with Processing and Blender […]
3d, autostereogram, depth map, magic eye, noise, processing, quick projects, random dot stereogram, script, zdepth — Jun 7, 2013