
Depth of Field in Blender
Depth of Field can be a beautiful effect, adding both aesthetic interest to an image, and serving a narrative purpose in drawing the viewer’s attention to the centre of attention. But getting DoF right using Blenders compositing nodes can be tricky, as there are a few things to know about how the defocus node works, and some limitations it has that you need to know about. This post documents my own investigations, and hopefully should be useful for those new to the topic. It also touches on a few things that I haven’t worked out how to fix yet, so if there’s anyone out there with input I’d love to know your opinions.
The Basics:
In real photography, depth of field is the effect whereby objects located away from the camera lenses plane of focus appear blurred. We can all read wikipedia (Depth of Field, Bokeh), so I’ll leave a deeper understanding of optics as an exercise for the reader. For the purposes of this post, there are two things we are concerned about: Achieving a result that is comparable with depth of field in real photography, and avoiding artefacts in still renders and animation. With this in mind, here is blenders defocus node:
This node takes two inputs: the image to be blurred (the yellow “image” input), and some way of telling the defocus node how much to blur different parts of that image (the grey value node labelled “Z”). The settings for the defocus nodes are as follows:
- Bokeh Type: Allows the user to set the shape of the aperture used to generate the bokeh effect. This allows you to mimic the effect that the aperture blades of a camera would have on the shape of the bokeh blur. The “angle” allows you to rotate the shape used.
- Gamma correction: Gamma corrects the image before blurring it, generally leave off if you have colour management turned on in your render settings, though it can give a nice effect sometimes of brightening the bokeh effect, which might be desirable.
- f-stop: With “Use Z-Buffer” enabled, this sets the amount of blur applied. Each halving of the default values will double the amount of blur.
- BThreshhold: Corrects artifacts around in-focus objects on a far-away (or non-existent) background. In general this can be left at one. Also note the tips later on always having a physical background where possible.
- Preview: For getting quick (but noisy) results to see how the size of the blur effect looks, turn this on. You’ll almost always want it switched of for final renders though. Handy when working with a large image and you’re still messing with compositor nodes. Samples is fairly self explanatory.
- Use Z-Buffer: Turn this on to use the cameras depth of field settings for the defocus. Remember to plug the z-pass from the render node directly into the defocus node. Turn it off to use any kind of mask or set the amount of blur manually using a value input.
- Z-Scale: With “Use Z-Buffer” turned off this multiplies the amount of blur caused by the Z input. If set to 1, a value of 1.0 from the input will give a blur radius of 1px. Turn up for more blurring.
Depending on how we want to achieve our depth of field effect, there are three different sources we can use for the latter input.
- Z-Buffer Method: This is the more straightforward method, in which we plug the z-buffer output from our render node straight into the Z input of the defocus node. This will then use the cameras Depth of Field settings (you can set it either to a used defined value, or to follow a specific object in the scene) to automatically generate the depth of field effect. This approach has several advantages:
- It’s simple.
- It allows the focal distance to be easily set and animated (for example to keep a moving object in focus).
But it also poses some problems:
- The amount foreground and background blur are not independently controllable.
- Artifacts occur around foreground objects, where they border objects that are in focus, resulting in sharp edges on otherwise blurry objects. Note the sharp edges and artifacting on the out-of focus foreground area in the bottom left of the animated gif below.

The former issue is easy to solve, the latter one more difficult, but both require splitting apart the foreground and background blur and using a custom value input for the “Z” input of the defocus node. I’ll refer to this as a “mask” based method, as essentially what we will be creating is a mask input for the defocus node showing which parts we want blurred, and which should be in focus.
- Mask Method: In this method, we split the foreground and background blur and apply the defocus affect for each separately. First, we blur the background:
The “map to” node takes the z-buffer and turns it into a mask we can use for the defocus. Using the offset, we can set a distance from the camera (using negative value), ane with the size setting we can control the rate of falloff. Here is the result of the map to node below:
And here is it’s effect when used as the input for the blur node (don’t stare at this one waiting for it to animate… it wont).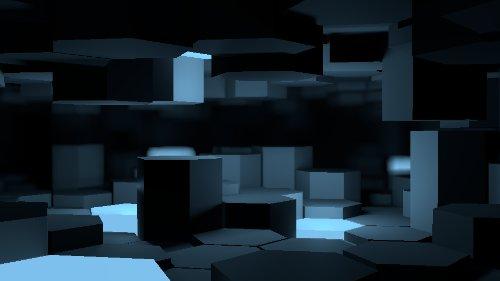
](/images/old/r1.jpg)
Then we blur the foreground, using a more complex node setup that also fixes the artifacts around foreground objects.
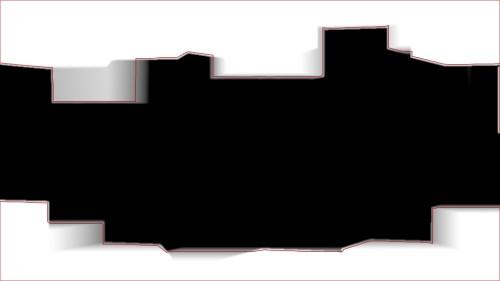
The map to node works the same as before, isolating the foreground parts of the image (note that this time the scale value is negative, making the background black and the foreground white). Then a ColourRamp node is used to flatten the values of the depth pass down from “float” values to something between 0 and 1. This is so that the blur applied later works correctly, but it does have the side effect that the foreground gets blurred a bit more evenly than the background. But given that the range involved is smaller anyway, you can kinda get away with this. You can always compensate with a higher size value on the defocus node if you need. The mask then gets dilated and blurred (so that some pixels around the edges of foreground objects are also defocussed, fixing the artifacts discussed above). The resulting mask looks like this (I’ve traced the outline of the mask before the dilate/blur to show what has been added):
This node is then used as the “Z” input for the second defocus node, which does the foreground blur on top of the already bacground-blurred image. The result:
 ](/images/old/gif_dof_compound.gif)
As you can see the result doesn’t have the artifacts present in the more basic setup. However there are still some issues to think about:
- This method might not cope well with larger amounts of foreground blur due to the dilate/blur nodes.
- This is more difficult to animate than the basic method as the map to nodes now control what areas are in focus, instead of the handy camera properties. However if you still need to animate the DoF distance, these values can of course be keyed or even driven with constraints to provide similar functionality.
- This will render slower, as two (computationally intensive) defocus nodes have to be composited for each frame.
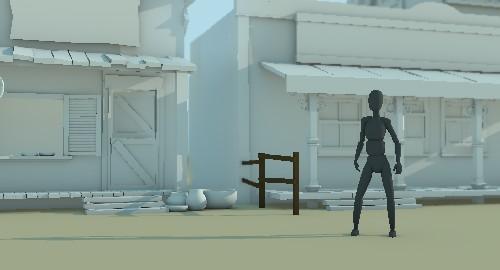
The third method for doing DOF blur is simpler to build, but takes a little longer to set up and render. It’s also not applicable in scenes where the transition between foreground and background are more continuous in nature. This is because we split the image into foreground, in-focus midground, and background layers and render and apply the defocus separately. On the bright side this works great for many standard kinds of shots. For this example the scene I’ve been using above isn’t so appropriate, so I’ll switch to something else:
- Layer Method: As with the mask method before, we start by blurring the background in the same way. But this time our foreground can be conveniently split into another layer entirely. Because of this we can quite easily do the foreground blur separately and just add it over the top. This way we can apply a uniform defocus to the foreground layer (no z input, just set the value), and not even have to worry about artefacts at the boundaries of objects.
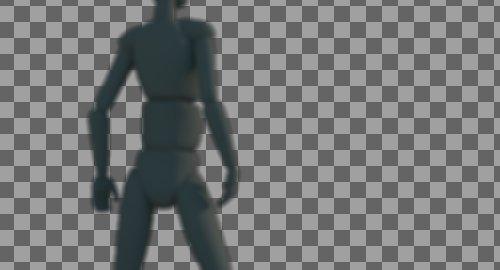
Background (not aliased, anti-aliasing occurs after all other nodes with FSAA on):
Foreground:
Anyway, those are my thoughts on doing depth of field in blender. Some final tips:
- Turn on FSAA! This is really important for getting nice DoF, as applying the defocus node to antialiased images can result in all sorts of fringing and artifacts. Alternatively turn off Anti-Aliasing completely, render at double size and scale down.
- Wherever possible have some kind of physical background to your whole image, rather than relying on the default sky background, as the extreme differences in Z-distance are frequent causes of artefacts from the defocus node.
- You can also use the regular blur node for depth of field using the mask or layer methods described above. These nodes are generally faster, but don’t give such nice bokeh effects or offer as many settings to play with.
Some further limitations:
- As discussed, there are some issues with artifacting when doing basic DoF, and to some extent you may always be fighting these.
- Bokeh in real physical cameras is a much more complex beast than the defocus node really allows for, and is affected and distorted by all manner of things. It interacts with lots of other aspects of a shot, such as vignetting and lens distortion, some of which you can fake with the compositor, others which may be more difficult or even impossible to apply as a post-processing effect. One reason for this is that real depth of field would actually require sampling points on surfaces that are occluded by geometry as the camera sees things, so it’s never going to match the real thing.
Further reading:
- Defocus node wiki documentation (blender 2.49, but all the settings are still the same).
- Depth of field on Wikipedia
- Bokeh on Wikipedia
Update: DoF distortion.
My friend @Laxy pointed out a little addition that adds a nice extra touch to the last setup, which is a slight distortion caused by the depth of field around out of focus foreground objects. Far from being a CG artifact, this is visible if you hold up your finger in front of your eyes and look past it at something beyond. With your finger out of focus, you should see a very faint distortion of the in-focus objects behind it. I came up with a nice way of achieving this effect in blender, using a normal pass from the foreground layer and the displace node:
Because the normals of the foreground pass generally point away from the object around its border, they can be blurred and used as an input for the displace node, which adds the distortion to the background before the foreground is laid over the top. You can see the result here (please note its far far stronger than it should be, just so it’s obvious what I’m getting at):
Comments
Martin Lubich (Jun 07, 2011)
That’s a very concise and complete coverage of the DoF in blender. The addition with the distortion is a very nice one too :)
Instead of going through the coloramp to get a clean [0..1] range I found it sometimes useful to setup a clipping with the minimum and maximum nodes. With this you do not change the falloff behaviour of your mask.
When doing the compositing in a different step from the actual render ( via multilayer exr files e.g. via a separate compositing blend file ) you have to make sure to import the camera animation from the original shot to your compositing file. This has to be done, because the camera focus information is not stored within the multilayer exr files.
Another disadvantage is that you cannot use FSAA when working with this workflow …
Reynante Martinez (Jun 02, 2011)
Thanks for sharing, Ben. Seldom do you find helpful articles that talk about DoF in Blender. This is indeed a savior to many. ;)
-Reyn
Depth of Field in Blender « BenSimonds.com « ThruDreamsgate's Blog (Jun 01, 2011)
[…] Depth of Field in Blender « BenSimonds.com. […]
daniel glenn (Jun 02, 2011)
Thanks a lot, very nice article for DOF..sweet
Aditia A. Pratama (Jun 06, 2011)
yeeay, pretty cool article Ben !!! so helpful, especially to split with BG and FG masking in node editor…it’s brand new method for me !
thanks
oliver Villar (Jun 05, 2011)
Hey, Ben!! This DoF tutorial is really awesome, and that tricks you comment make it work a lot better!!! I’ll announce it at blendtuts.com ;)
Thanks for sharing! :D
Adhicipta R. Wirawa (Jun 05, 2011)
Thanks a lot Ben ^_^ This article is very helpfull!
Riton (Jun 07, 2011)
Nice Article Ben !
A quick tip to have a nice Z-map is, instead of connecting the Z output to a “map-value”, you can connect it to the “normalize” node, which will automatically create a Z map which go from black to white.
Cheers,
does anyone know how to make these awesome honeycomb models? (Jun 07, 2011)
does anyone know how to make these awesome honeycomb models?
Ben Simonds (Jun 07, 2011)
Add a circle with 6 verts, extrude into a cylinder, duplicate with an array modifier. I just wanted a quick scene to demonstrate the effect.
Jeff (Jun 07, 2011)
thank you, i was wondering about correct usage of masks, it seems this is one of the ways a mask comes in handy
Pascal (Jun 08, 2011)
Do you have any hints on how to create / where to get such beautiful simplified human characters?
Jan Bures (Jun 08, 2011)
Thank you for nice expamples. Nodes are awesome.
Ben Simonds (Jun 08, 2011)
The one in the examples was one I made just with some really basic geometry and rigged with riggify. There was another one floating around with a creative commons licence, but I’m not sure it’s up to date with blender 2.57.
Pascal (Jun 16, 2011)
Thanks for your response Ben.
Please let me just in the case you see it again sometime, I’m sure I could learn a lot from looking at how these are made.
Did you use the “Add UV Sphere” for the spheres or is there a prefered method in edit mode?
Greetings, Pascal
Depth of Field in Blender at BlenderNation (Jun 07, 2011)
[…] how to fix yet, so if there’s anyone out there with input I’d love to know your opinions.LinkDepth of Field in Blender GA_googleFillSlot("BN_Content_468x60_below_post"); Related NewsNo related postsRelated posts […]
Profundidad de campo en Blender (Jun 14, 2011)
[…] Ben Simonds ha publicado en su sitio web un tutorial acerca de generación de Profundidad de Campo (DOF, por sus siglas en inglés) en Blender. El documento comienza por explicar el concepto teórico del DOF, para pasar a lo práctico, a ver como los parámetros a utilizar dentro del software open source mencionado. Pueden consultar en el siguiente enlace. […]
Ben Simonds (Jun 17, 2011)
The manikin rig wasn’t made with spheres, but with subdivided cubes.
40+ Highly Useful but Rarely Collected Blender’s Tutorials | Dzineblog360 (Dec 04, 2011)
[…] Depth of Field in Blender […]
tbarbe (@tbarbe) (May 05, 2012)
Great article Ben!
I’m researching bokeh and blur effects - specifically I’m trying to match the bokeh and blur/distortion of an anamorphic lens. anamorphics cause the background blur and bokeh to get squashed vs the foreground in focus parts…
I was thinking of ways to accomplish this - like perhaps feeding Z depth to some blurring along with a displacement node to squeeze the background layers along some axis
Would you have any advices on doing this?
Ben Simonds (May 06, 2012)
Interesting question. Anamophic bokeh has a distinctive look. I gather the reason behind it is that whist an anamorphic lens gives a 2x squeeze for stuff in the focal plane, beyond this the squeeze is greater, so background bokeh looks squashed as a result. Replicating this in a comp setup could be somewhat difficult depending on your scene. If you can split up the background and foreground into separate passes, then it’s relatively simple to apply the squeeze to the background before blurring, and then unsqueeze (though not 100%, and you may have to apply some scaling to then fill the frame again. For a full scene it might be more complex.
On the other hand, if you can render with a more physically accurate renderer, then you might be able to create the bokeh effect you want physically, see these links for examples: http://lesterbanks.com/2011/08/using-custom-bokeh-effects-in-blender-cycles/ and http://www.diyphotography.net/can-you-make-computerized-shaped-bokeh
Hope that helps!
tbarbe (@tbarbe) (May 06, 2012)
Awesome reply Ben… and awesome tutorial as well. Thanks for your kind replies! I will dig into the physical based lighting examples…
I’ve experimented with Cycles creating different shaped bokeh with cutouts in front of the camera…and Ive looked at splitting layers and then using displacement node or something to adjust the scale of the background parts… i guess if I test with the lens and get a feel for what the originating source will do to items in the distance - I can better match up what I make in 3D to the footage!
I know this has been done before somewhere… it’s just a bit more rare lately as anamorphics have gotten less use in mainstream cinema and their cost it prohibitive to lower budget shoots…Ive got a hacked projector anamorphic that produces ok results but the blur and style are going to give me a problem if Im going to have any 3d elements or effects in the scene…. I have to learn how to “blend” those items so they look realistic!
:) thanks again!
tbarbe (@tbarbe) (May 07, 2012)
Hey Ben! Check this out…. look in the comments:
Useful Blender Tutorials | Jorge Bouza (Apr 29, 2015)
[…] Depth of Field in Blender (not Cycles) […]
suzhou lingering garden (Jan 30, 2016)
Suzhou gardenms or the venice of the east as it is also known is a peaceful
place to visit when your in Jiangsu Province, China.You can easily arrive there from Shanghai or Nanjing two big cities that are close by.
You can take the highspeed g-train, d-train,t-train or k-train. Its is also
possible to arrive by bus if you are coming from a more remote
place that doesnt have a train line. There are many gardens
in Suzhou and we offer amazing local tours of this Unesco World Heritage Site with
friendly local guides who have been well trained to give you the best possible experience.
Afterwards we will take you to the local restaurant with good quality fresh food that you will
find amazing.
blender, blur, bokeh, compositing, depth of field, dof, focal blur, focus, tutorials — Jun 1, 2011