
Creating tileable patterns with GIMP, Inkscape and Blender
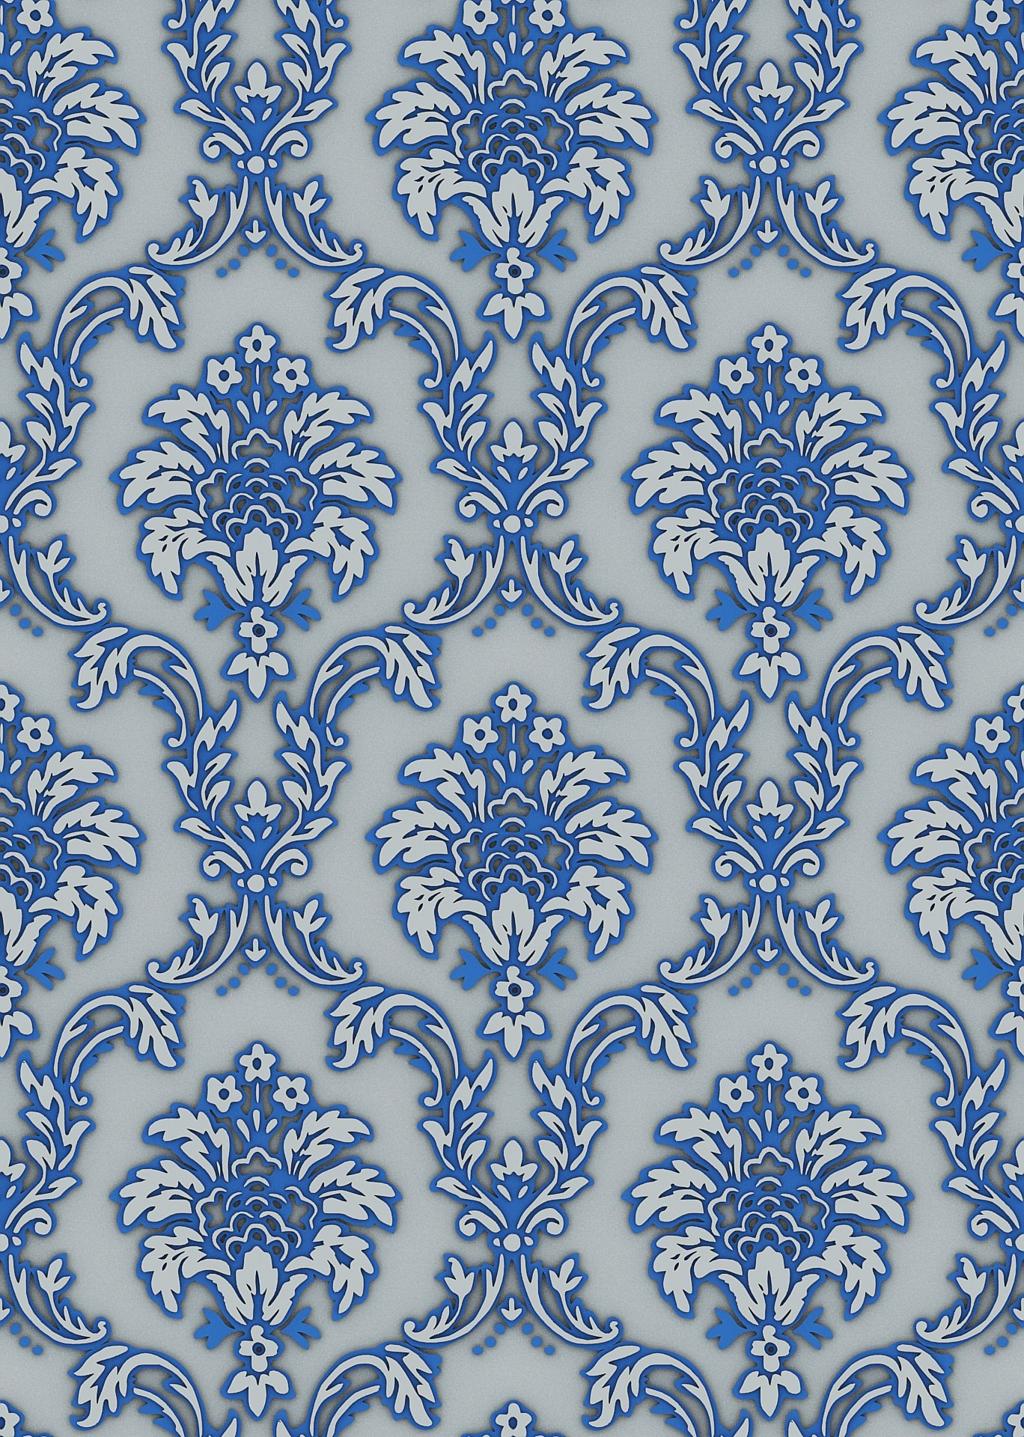
Trying to isolate a tileable pattern from a photo or sketch to use in your 2D and 3D projects can be a pain, and often involves tedious tracing of patterns by hand. I’ve come up with a method for generating tileable raster/vector/3D curve based patterns from photos that automates some of the tedious parts and gives good results, using the free and open source softwares GIMP, Inkscape, and Blender. For this tutorial I’ll be using one of the free textures from CGTextures.com:
Stage 1: GIMP
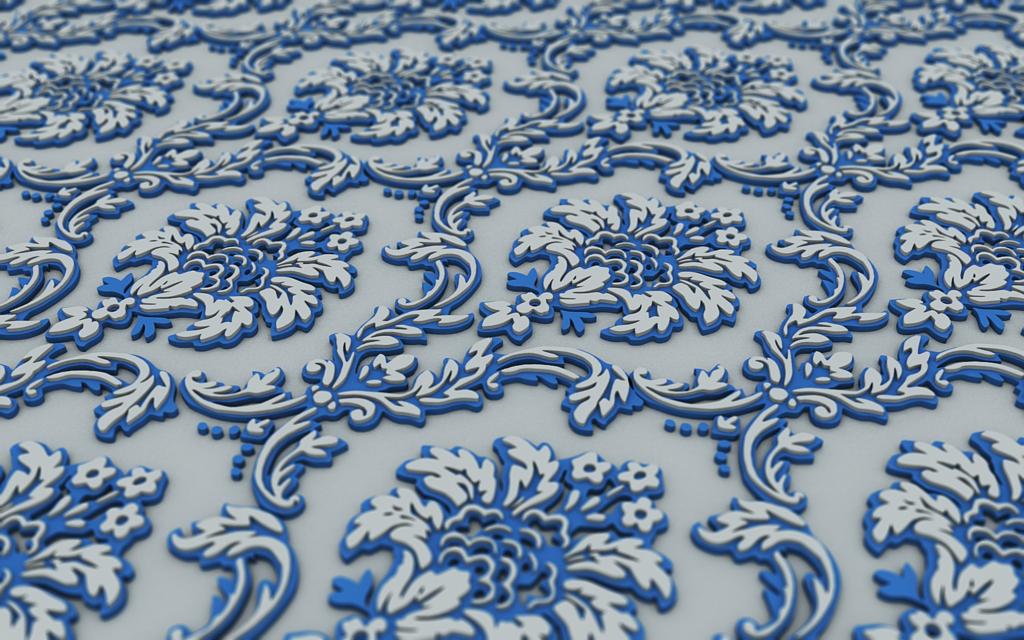
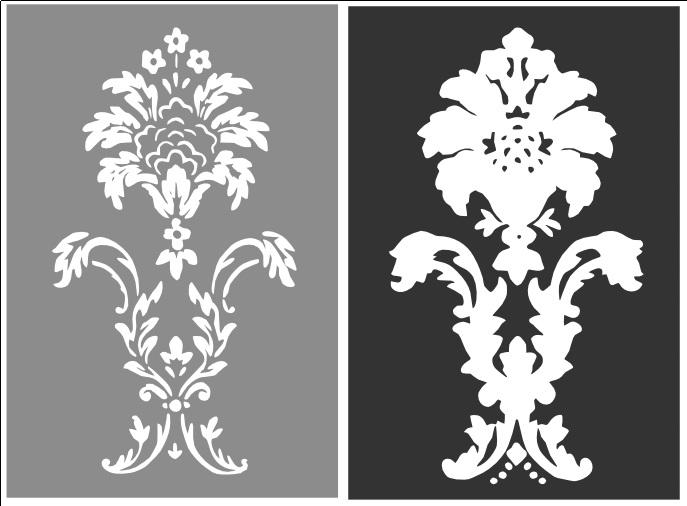
Our aim in the GIMP is to simplify the image as much as possible, so that later the automatic extraction of the pattern can be achieved with minimal input from us. This involves identifying the repeating unit of the texture and isolating it, followed by increasing the contrast between the different elements as much as possible. This is the result of this process, and shows a single repeating unit:

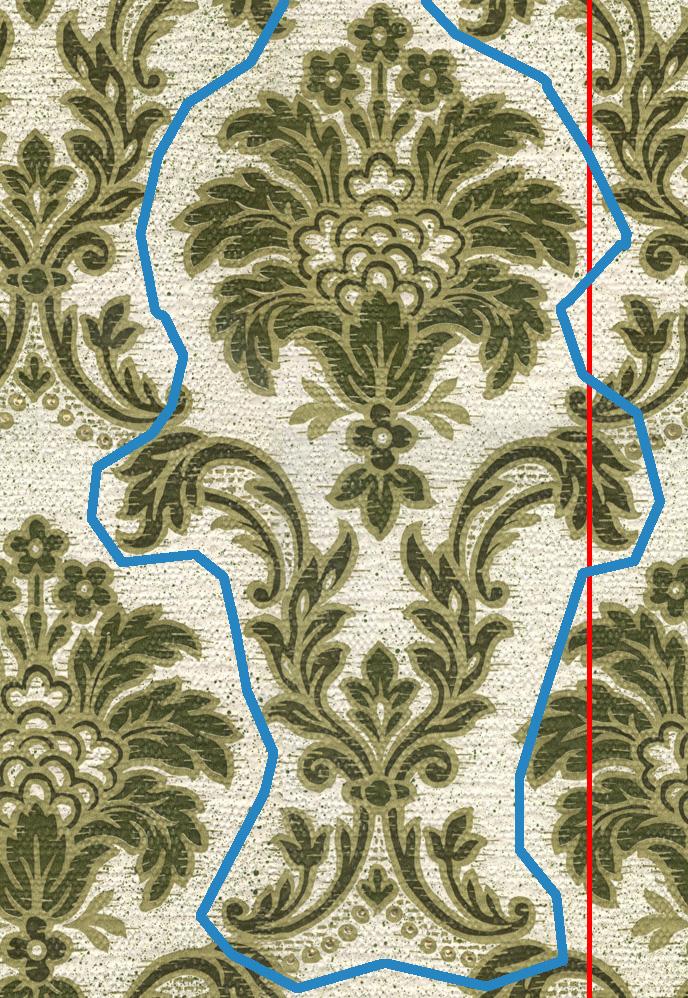
Step 1. Opening up the texture in the GIMP, we notice that there isn’t a part of the image that shows an entire repeating unit of the pattern. To solve this we duplicate the layer and place it under the original and move it until we can match the pattern up with the layer above once again. We repeat this until we have a full repeating unit. Don’t worry about being to tidy at this stage however, as we will clean up any rough edges later. In the image below the repeating unit is outlined in blue and the boundary of the original image marked by the red line. Once we have this repeating unit we can erase everything else. We’ll reconstruct the rest of the pattern by copying this single unit later.
Step 2. The next problem we have is that there is an underlying fabric texture that we don’t want interfering with out efforts to extract the main pattern. To get rid of the underlying grain to the texture we use two filters in the GIMP. First, do a simple Gaussian blur (blur > Gaussian blur from the filters menu) of around 6 pixels to even out some of the grain, followed by a Selective Gaussian blur (found in the same menu). Selective Gaussian blur only blurs pixels together if they are already quite similar and so it is ideal for evening out the different coloured areas without blurring the boundaries of the different parts of the pattern. Adjust the threshold and the blur radius until you have a nice balance of even colours within regions and clean edges between different parts of the pattern:
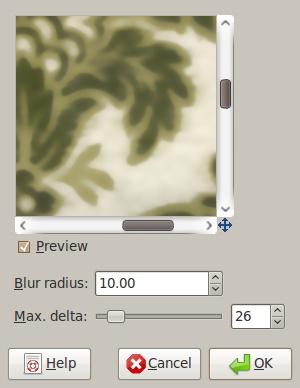
The selective Gaussian blur dialogue.
Step 3. To make the edges even cleaner, we now use the select by colour tool to select the different coloured parts of the pattern. By adjusting the threshold of the select by colour tool, and using the add and subtract modifiers (shift+click and ctrl+click respectively), you should be able to isolate a single coloured part of the pattern. Once we have this selection, we could simply use the fill tool to fill our selection with a flat colour. However, the results of this would still be messy, as we haven’t eliminated 100% of the grain from the image, and the borders of our selection are slightly wobbly. Instead we will use the convert selection to path tool in the paths dialogue to convert this selection to a much cleaner path, which we can then fill with a single colour. This also allows us to re-select the same areas later, or even stroke their outlines if we wish.
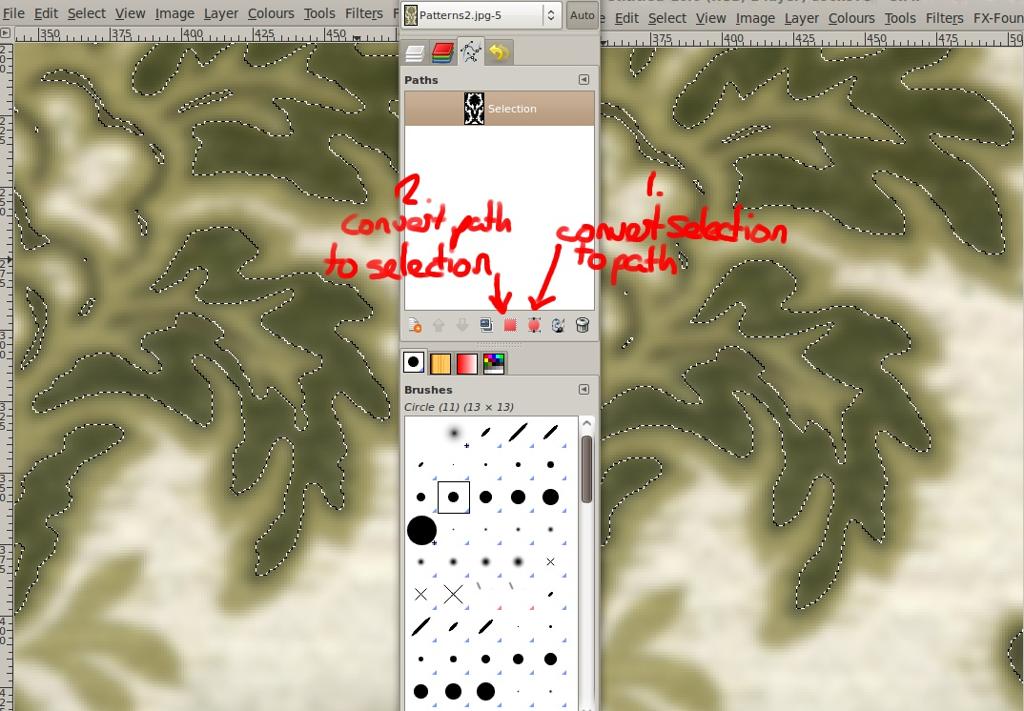
Left: Selection by colour. Middle: Paths Dialogue. Right: Selection after converting to path (1) and re-selecting (2). The difference between the two is subtle, but the latter gives cleaner results.
Step 4. Once we have our selections, then on a new layer we can fill them with a flat color. For the next step it is ideal to convert our image to grayscale, as we will be using Inkscape to convert the image to curves based on brightness. Thus we simply fill background with black, the outline part with 50% grey, and the dark central parts with pure white. After a small amount of cleaning up with the paint tool (use Ctrl+click to select colours from the image with the eyedropper, and paint over any problem areas), the result is the image shown at the beginning of this stage. We will save this as a .png file for the next stage.
Stage 2: Inkscape
Inkscape has an excellent tool that allows you to convert a raster image such as a .jpg or .png into vector format. We can then import the paths from this vector image into Blender. Because we have already done most of the hard work in the GIMP, this stage is easy. We simply import the .png image we made in the GIMP using File > Import and then open up the bitmap to path tool from the paths menu via Paths > Trace Bitmap:
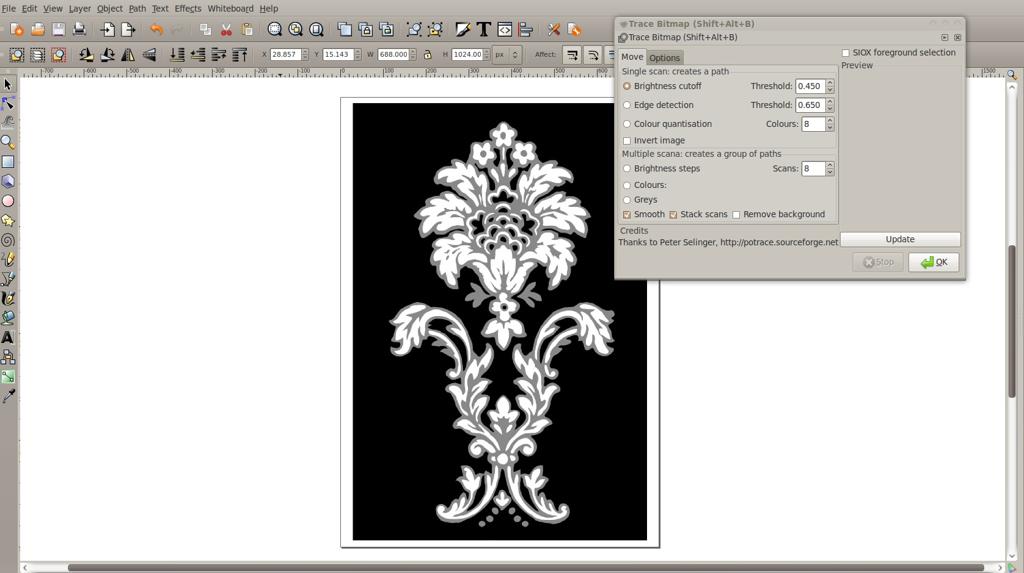
Our imported image with the Trace Bitmap dialogue open.
Step 1. Since our image is in black and white, and only has three shades, the “Brightness Steps” option is ideal for converting our image into paths. We choose this options and set number of scans to 2, since the background colour of the document is the third colour. Then click ok.

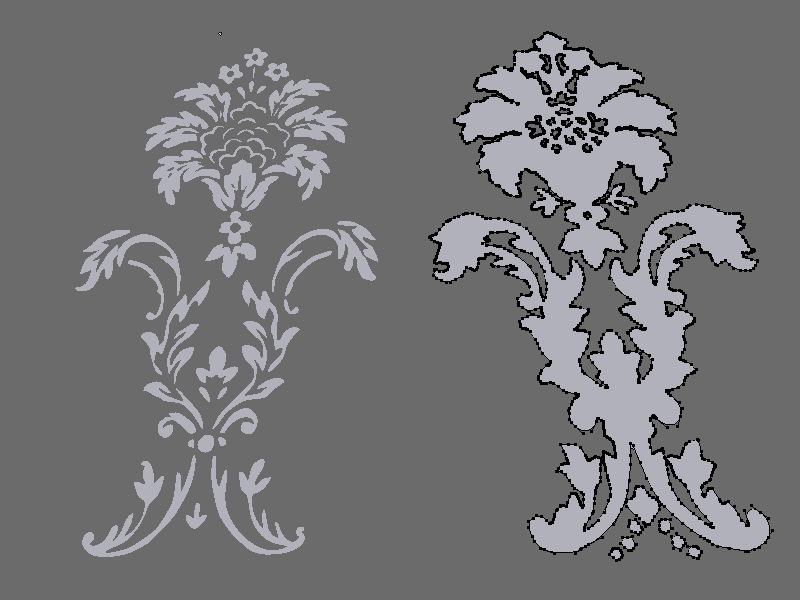
Step 2. The result is our image, traced and converted into a group of paths. We can now drag it off to one side and then delete our original imported image, as we don’t need it anymore. Then select our new traced object and click ungroup  in the toolbar to split the different colours apart. Finally, click and drag to move each layer away from the others and save as a .svg file.
Our paths, split apart and ready for importing into blender.
Stage 3: Blender
Now that we have our repeating unit in SVG path format, we can import it into blender to use however we please. From here you can use it to generate bitmap images that tile flawlessly, or as part of your next model or project. I’ll demonstrate how to import into blender and then create a tileable render, but really what you do with the results is up to you.
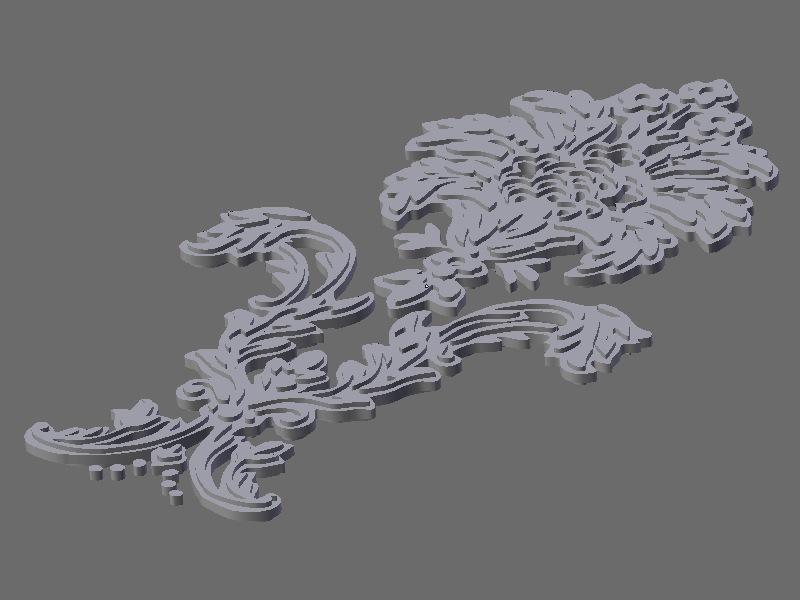
Step 1. Use File > Import > Paths to import the .svg file you created, select “Inkscape (.svg)” from the menu when prompted. This will create a blender Curves object from your paths. Go into edit mode (Tab) and select the rectangular outlines around each part (simply hover over it with your mouse and press “L”) and then delete them (x). Then box select one of the two halves (b) of the object and press P to separate them:
The imported curves, with the rectangular outline removed and separated from one another.
Step 2. To align the two objects on top of one another, select each in turn and use “centre new” from the edit buttons (press F9 to show them in the buttons window). Then use clear location (Alt+G) in object mode to place them both at the origin. If the offset between the two isn’t quite right, then just go into top view (Numpad 7) and tweak their locations, and then put their centres back at the origin by pressing Shift+C to reset the 3D cursor, selecting the two objects and doing “Centre Cursor” from the edit butons. Once this is done, try giving bit of extrude to your two curves to make them easier to see. Also, you can set the resolution of the curves (the rather cryptic “DefResolU” slider in the edit butons panel) much lower than the default 24, since our imported curves already have a lot of points, start low and work up until you get nice, smooth looking curves for the most efficient results. I settled at around four.
Step 3. Now we want to repeat these objects over a regular grid to create our tileable pattern. To do this we’ll use dupliverts. Since our pattern repeats in a diamond arrangement, create a new plane in top view and in edit mode rotate it (r) 45 degrees. Subdivide the plane once (w > subdivide) and then return to object mode (Tab). Now select your curve objects and parent them to your newly created grid (select the curves, then the grid, and do Ctrl+p). Turn on the Dupliverts option for your grid object under Object Buttons (F7) and your pattern will now be repeated!
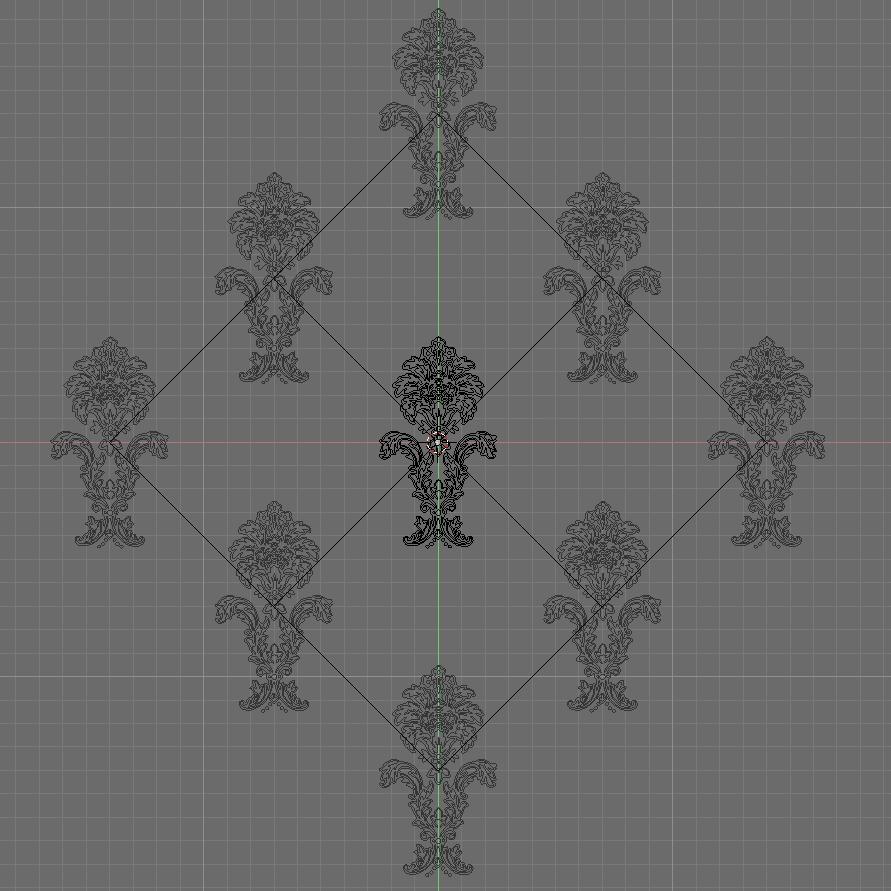
Our imported curves repeated over the grid.
Step 4. Select the grid and go back into edit mode and scale the grid in the x and y directions separately (s > x or s > y) to get the spacing between the repeats right. You can subdivide the grid further and scale it up to get more repeats if you want.
Step 5. Finally to render out a single repeatable tile you need to set up the camera just right. Create a new camera at the origin (space > add > camera in object mode) and move it up a few units. Then check “Orthographic” in the objects edit buttons. You now need to determine the correct scale so that the rendered image covers exactly one tile. To do this, select your grid and go into edit mode, and select the top and bottom vertices of a single square of the grid, press “f” to create an edge between them. Now check Edge Length in the Edit Buttons panel and the length of this edge will be shown on screen when it is selected. Select the camera and set it’s lens scale to this value under object buttons. Now the maximum dimension of the cameras view is this many blender units.
Step 6. In the render buttons panel (F10) set the y resolution to a convenient multiple of the value you measured in step 5. Then repeat Step 5 to get the width of one diamond in the grid and use this (multiplied by the same amount) as the x resolution of the render. If you now look through the camera you will see that a single repeated unit is now shown in the camera’s view. Set up your materials and lighting as you wish and render - you will get a single tile of your texture! It should tile seamlessly too without any further modification!
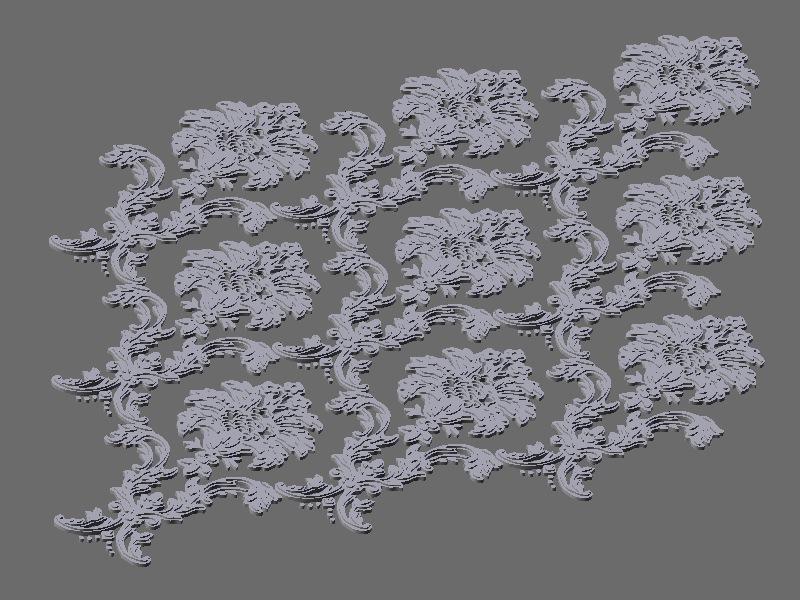
A single tile of our repeating pattern. Rendered with simple flat materials and lit with ambient occlusion.
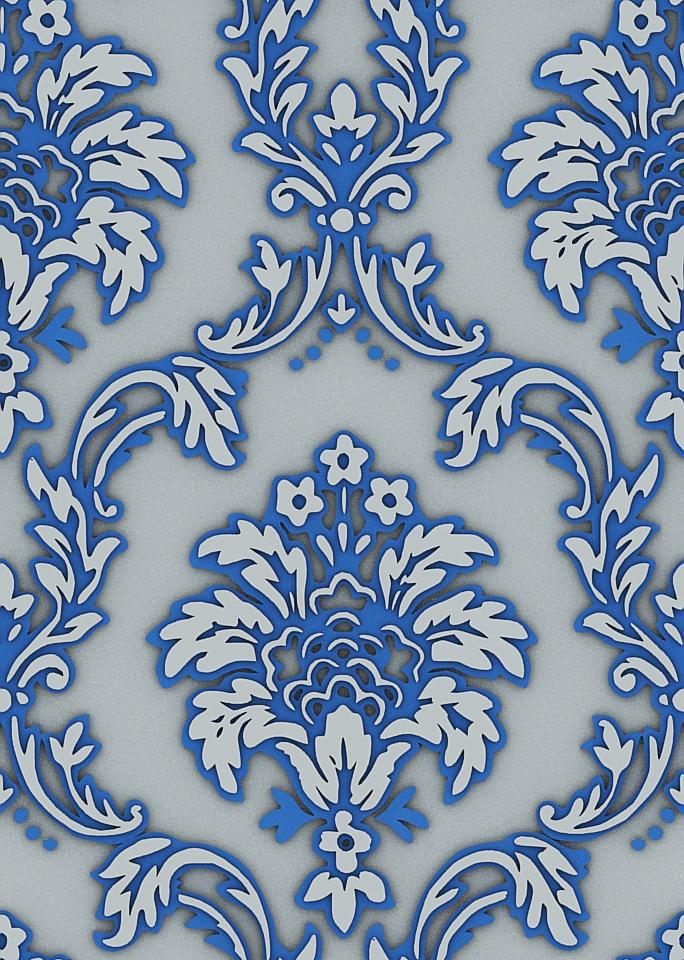
The same image, opened in GIMP and repeated with the “Tile” filter.

The same scene using simple black and white materials set to “shadeless” in the materials settings panel. This could be tiled and used as a bump map for example.
That’s it! There are plenty of other things you can use this tutorial for, so feel free to experiment, and please comment with any questions, comments, or suggestions you have!
Update: Watch this timelapse modelling video, which shows how I use a pattern created with this method, converted to a mesh, to repeat a pattern over a curved surface.
Comments
comeinandburn (Jul 14, 2009)
This is an outstanding tutorial! This should be submitted to Blender Art Magazine.
thanks for sharing!
LucidNovelty (Sep 27, 2009)
Came across this while looking for something completely different. Very nice workflow, Lost the entire evening playing with it.
Thanks
anton (Dec 04, 2009)
Hmm.. This is probably the only way to do it if you have to convert the 2d shapes in to 3d splines.. But there is an alternative which seems more reasonable to me:
The only thing you need is to find ornament font and then you can start type in 3ds max with the text tool, and if needed to reduce the vertex numbers .. which can be done with a free plugin called Optimize spline.
craigsnedeker (Jul 13, 2009)
This looks great! I gotta try it sometime
loramel (Jul 12, 2009)
Very interesting and unique approach. I will definitely give it a try.
Thanks for sharing.
Blenderman (Jan 14, 2010)
hm…interesting idea, i think i might give it a try
unfa (Mar 25, 2010)
Very good tutorial! Interesting, clear and with lots of valuable informaton. Thanks for sharing your knowledge, Ben :)
mCasual/Jacques (Jul 09, 2010)
Hello, i used the pattern as wallpaper in a short animation ( which is exerpted from a longer tutorial about sketchup )
over here: http://www.youtube.com/watch?v=dLl-mGlsKEY
the wallpaper appears around 0:30
thanks !
mCasual/Jacques (Jul 09, 2010)
oops i wanted to make a comment to Ben Simonds but somehow it got grafted to LucidNovelty’s post
Ivy pattern « Serenblip's Blog (Jun 28, 2011)
[…] This Japanese ivy pattern is one of my favourites. It doesn’t repeat that often (if it does it fools me anyway). My plan was simply to take a photo of a pattern and turn it into a usable and resuable vector. My first few steps are taken from this tutorial on bensimonds.com […]
Creating tileable patterns with GIMP, Inkscape and Blender « THINKING BLENDER 3D (Aug 28, 2011)
[…] a comment » Creating tileable patterns with GIMP, Inkscape and Blender « BenSimonds.com. Share this:TwitterFacebookStumbleUponDiggPrintEmailLike this:LikeBe the first to like this […]
M (May 24, 2012)
Wow, great! It’s just what I’ve needed. Thanks for tutorial Ben, it’s very helpful and clear. Thanks it I’ve become interested in Inkscape.
Ben Simonds (Mar 11, 2013)
Sorry, I made this a pretty long time ago and I don’t think I have the files anymore. Even if I did, they’d be old 2.4x files.
It’s pretty simple to set up though, just subdivide a plane and turn on dupliverts. The only tricky part is doing the maths to get the camera set up just right so the image tiles.
ToddG (Mar 10, 2013)
Ben - can you make the files available? I would love to see the actual blender file. (I’m very new to blender and trying to do exactly this.)
ToddG (Mar 11, 2013)
Thanks Ben -
I have started the tute and am now hung up on Step 2 after getting both sets of paths centered on the origin.
I can’t find the buttons to select vertices, paths or faces, or the Defresolu and definitely have not figured out how to actually extrude anything yet. Advice? :) Thanks again.
How To Create A Tileable Texture In Gimp | How Find Money (Jul 22, 2016)
[…] Creating tileable patterns with GIMP, Inkscape and … – Trying to isolate a tileable pattern from a photo or sketch to use in your 2D and 3D projects can be a pain, and often involves tedious tracing of patterns by hand. […]
Rohan Bang (Dec 12, 2017)
Awesome work☺
blender, gimp, inkscape, pattern, tileable, tutorial, tutorials — Jul 6, 2009