
Controlling HDRI Lighting with Nodes
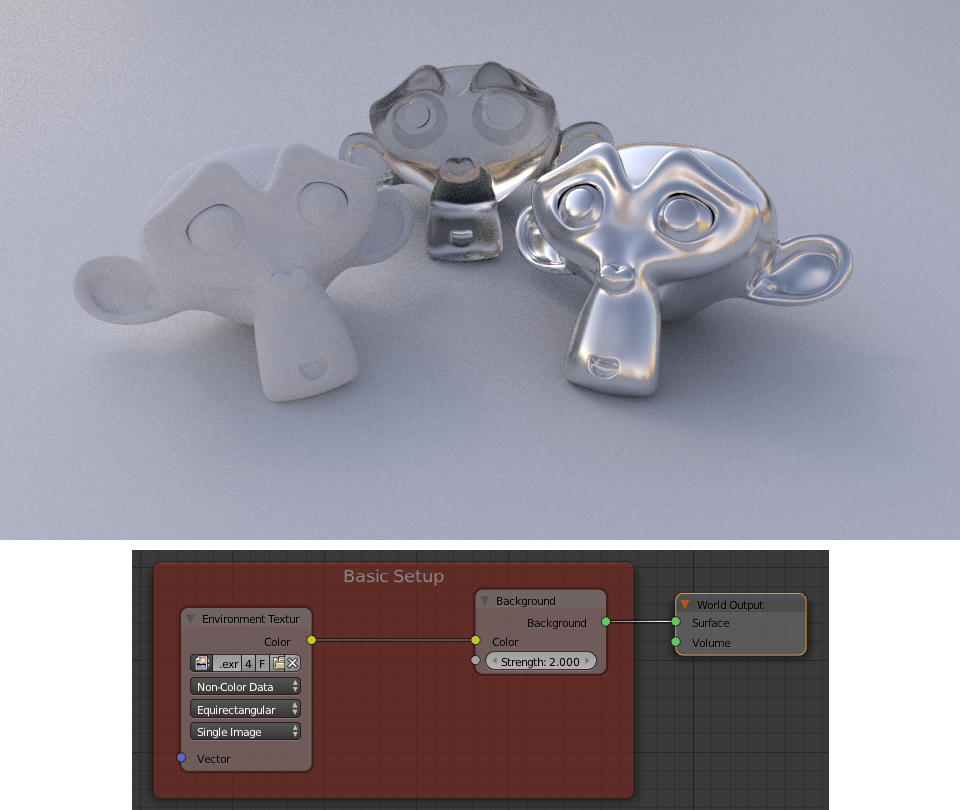
I’ve seen a couple of posts recently on getting more control over HDR based lighting setups, specifically in terms of getting crisper shadows. In particular Reyante Martinez and Greg Zaal each posted some great setups that used the colour of an HDRI map as the input to the strength node of a background shader. I thought I’d add my own experiments to the mix. Here’s a basic world setup for cycles. Just a HDR map plugged into a background node. No other lights in the scene.
Here’s a setup based on one that Greg posted in his original article. It gives stronger shadows by plugging the HDRI map into both the colour and intensity inputs of the background node.

Of course there are many ways to achieve this sort of effect, and so the answer becomes which is the most effective, and which gives you the most control. The setup above gives you some control over the shadows, but by plugging the map into the strength input it becomes more difficult to affect the overall strength of the environment lighting (incidentally, Greg posted some great improvements to the above setup in his original article). What I really want to do is to be able to control the contrast of the lighting without affecting it’s colour, and whilst still maintaing control over it’s overall brightness. I tried a few setups with this aim in mind. This was my first one:
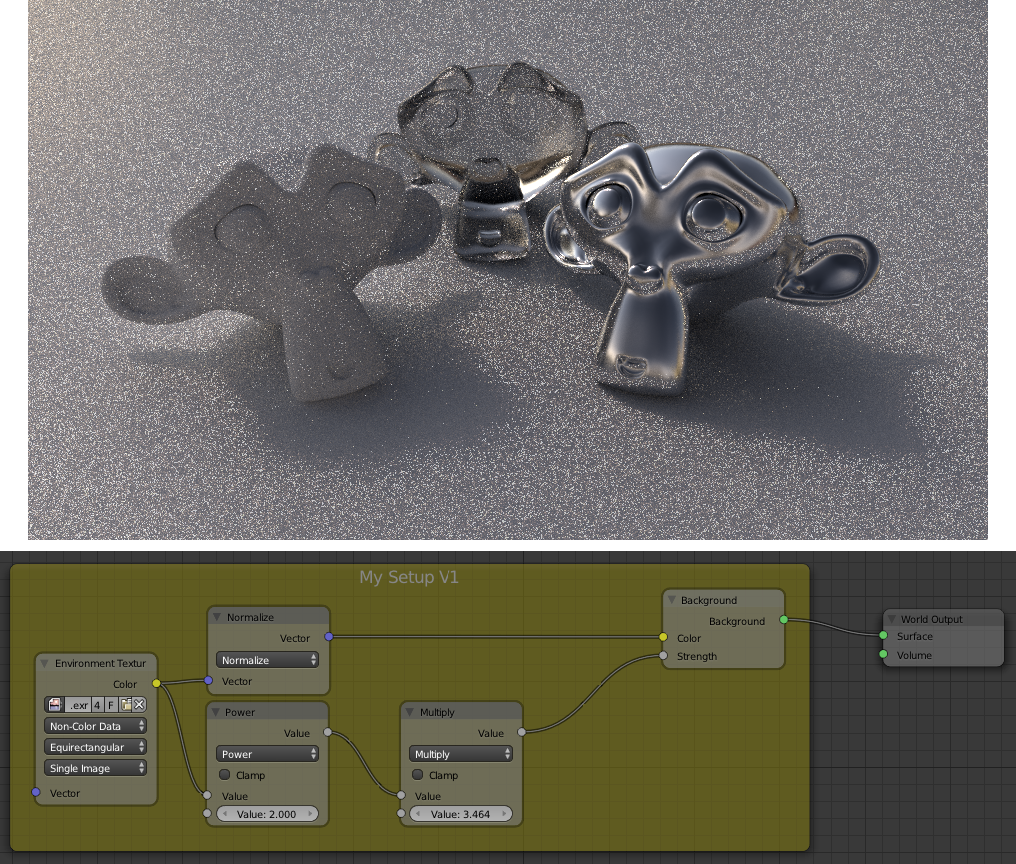
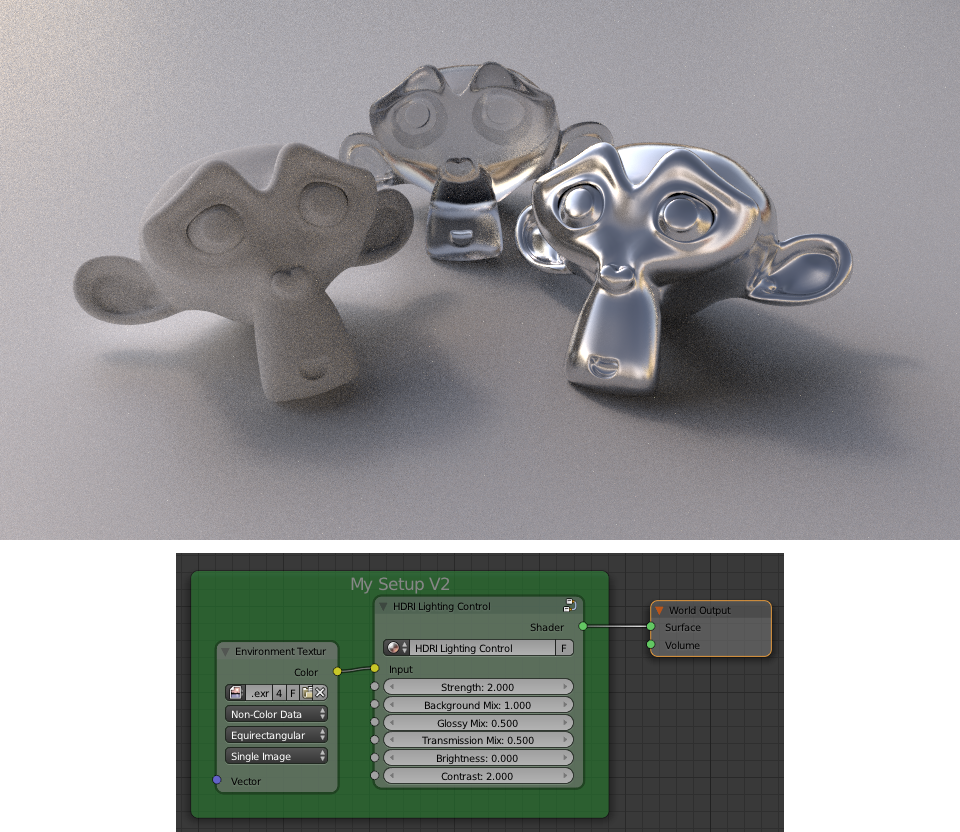
This setup was my first attempt, and I was mainly concerned with making sure my math checked out so that I could get my head around future setups. Here I normalised the input to the colour node of the background shader. This gave the colour input for the background node a uniform intensity. I then extracted the value from the HDRI map and processed this separately, then used this as the input for the strength node of the background shader. By putting this input through a power (math) node first (or any other manipulation you prefer) I could control the strength and contrast of the lighting (raising it’s intensity to a higher power results in more contrast). Notably, this setup resulted in a lot more noise. I think this is because my setup messes up the Multiple Importance Sampling for the world (which I had turned on for all my renders). This convinced me that I should try and modify the input to the colour socket of the background node, rather than the strength, which should be kept to a uniform value, in order to avoid unnecessary noise. This setup also results in some crazy backgrounds, and glossy reflections that don’t make sense. To fix these issues I made use of the light paths node and a few mix nodes to blend in the unaltered HDRI map where appropriate, namely for glossy, transmission and camera rays. I also switched to using a Brightness/Contrast node to affect the lighting strength. The result is the following setup:
The node group of which contains the following nodes:
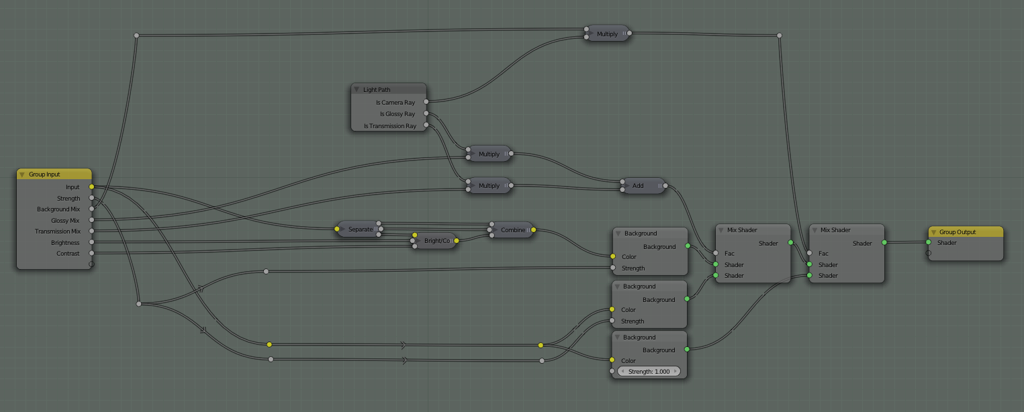
This node group provides a lot of flexibility whilst remaining easy to work with. You can control how much your environment affects your lightings contrast and overall brightness and adjust how this affects other aspects of your render like glossy reflections, transmission rays and the background as viewed by the camera. Here’s a few examples: Different contrast adjustments:

Adjusting the look of Glossy Reflections:
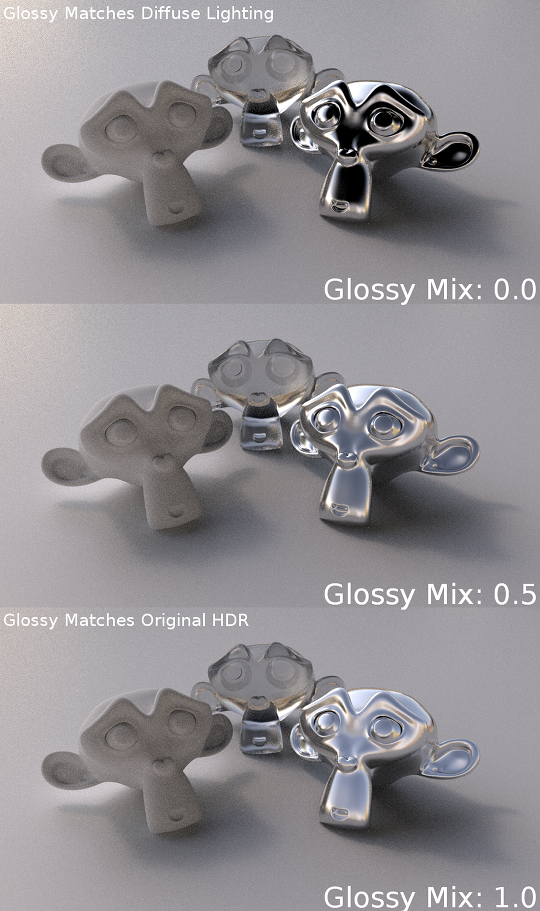
The same effect shown above for Glossy reflections can also be controlled for transmission rays. So far it seems to work pretty well. If you give it a go I’d enjoy hearing your thoughts on it and how it worked for you. You can download it here. Note: The HDR map I used is not included. You can download it from BlendedSkies.com, which is a great resource for HDR panoramas as well as other stuff like pre-tracked footage and backplates for compositing renders onto.
Comments
vitos1k (Nov 07, 2013)
But doesn’t it uses only 1 channel for non color data(BW intensity) ? Where as for Color Data it uses 3 channels for RGB
Ben Simonds (Nov 07, 2013)
I’m pretty sure that the colour/non-colour data option isn’t to important for HDR images, as they’re linear to begin with, and will be treated as such either way. It’s more relevant when using images with lower bit depths that you might not want to be assumed to be in sRGB colour space, such as masks or normal maps.
Gumballs! | David Zerba (Nov 24, 2013)
[…] used an HDR image made by Greg Zaal for the lighting, with a node setup created by Ben Simonds. With Ben’s node setup, the lighting was way more accurate and had a lot more […]
Reynante M. Martinez (Nov 08, 2013)
Amazing! Thanks for sharing this, Ben. I linked this article to my original post as an update, I hope you don’t mind. :)
-Reyn
Ike (Nov 13, 2013)
Now all we need is a way to render a shadow pass from this lighting setup so it can be composited on live plates. Unfortunately Cycles currently can’t seem to render a separate shadow pass for HDR lighting.
Ben Simonds (Nov 07, 2013)
Nope. Colour/Non-Colour is an assumption about colour space, not how many channels an input has. Otherwise you’d see no colour in any of the renders here!
vitos1k (Nov 07, 2013)
i was always wondering why everybody use “non-color data” for the color socket? why just don’t use a node with set to “Color data” for color input, and “Non-color data” for the strength. Also as i found all these contrast difference is due to .hdr which is linear and is threated as linear for values, but does it dispalyed properly(for sRGB) when rendring?
probably we just need to add Gamma adjustment node, and tweak ‘look’ of the texture. and adjust it’s strength and contrast to get sharp shadows, while still have correct (not darkend) glossy reflections and background gamma. That’s just my thoughts, no tests yet
Steven (Nov 11, 2013)
So my question would be that, how did you realized what has to be done to achieve this node setup, and how can i learn this?
David Zerba (Dec 03, 2013)
Hey Ben, I’ve nominated you for the Dragon’s Loyalty Award since you blog is really helpful and inspiring to me, I’ve learned a lot from it. You can see it here :http://davidzerba.wordpress.com/2013/12/02/dragons-loyalty-award/
Fred Flinstone (Mar 05, 2014)
Seems like you are burning the blues of the image.
Why not just crush the blacks and raise the highlights of the rendered image if it’s contrast we’re after?
Harleynut97 (Jan 17, 2015)
Hey Ben, Someone recommended this technique, and I realize this was originally posted almost a year ago, but let me ask 2 questions
When I downloaded your blend file the file name said V1 in it. But yet you are discussing V2. Is the file you have available to download V2 or V1?
I opened this up in Blender version 2.72b official. When I looked at your render settings both clamp direct and clamp indirect was set at 100. I seems strange that the clamping would be at this extremely high level. Could you confirm what it should be based on newer versions of Blender 2.72, 2.73
Thanks for sharing this technique.
mcolinp (Apr 29, 2018)
The dropbox link is no longer working. Any chance I can download a copy of your sample blend file/node setup?
I am doing research in anticipation of 2,8 and Eevee. I would like to find a way to use these effects for interactive 3D wegl output. verge3D from soft8soft.com is my current tool of choice; though I have been patiently waiting for the release of 2.8 Eevee to be able to take advantage of the better materials and environment features.
blender, cycles, hdr, hdri, lighting, nodes, resources, shading, tutorials, world settings — Nov 7, 2013